Well happy Monday! Here it is the start of a new week and I was actually in the studio creating this weekend. Well at least I was creating on Sunday. Saturday I walked a 5K race with some of my friends . . . in the rain and all but we still had a great time! I’m looking forward to the next one . . . . whenever it might be . . .

During one of my walks this week, it occurred to me that I’ve been stamping for a long time. I purchased my first stamps back in the 1980s but had to put them away when my girls were small. Once they were in high school and we didn’t have the scout troops, the swim lessons and they were essentially growing up, I took them all out again. When they both left home and were in college or out on their own, we had 5 years of being empty nesters. I had a lot of time to get my creative mojo on with no outside pressure or demand on my time.
Then one day I turned around and they were all home again! One graduated from college and came home with illness and the other got a divorce and came home with my granddaughter. Neither of my girls live here now . . . they have a house together, along with the granddaughter, 2 blocks away from home. I can’t see their house from mine, but if I cut through the neighbors yards at the end of the street I’m in their front yard. They’re near enough if they have a problem . . . like the house being hit by lightening . . . and yet far enough away that we don’t see each other all of the time.
Of course, I am the childcare provider for my granddaughter . . . so I do have her anywhere from 3 to 5 days a week. It just depends on whose weekend it is. She keeps me grounded and makes me step back to enjoy the moment. I wasn’t able to do that with my girls. I worked full-time until they were both in grade school and missed with them what I’m able to enjoy with the granddaughter. We take walks, and build houses, and make puzzles and sing the Hot Dog Song with Mickey. Now that the weather is warmer we play in the water and blow bubbles for hours on end.
My time for me is limited again, and I’m learning to live in the moment and enjoy things as they come. I’ve worried a little about the mojo being gone . . . but you know what . . . it’s still there! It’s just buried for the moment. I can feel it bubbling up and have so many ideas in my head of things I want to work on. Maybe it won’t be cards or canvases, but it surely will be creative.
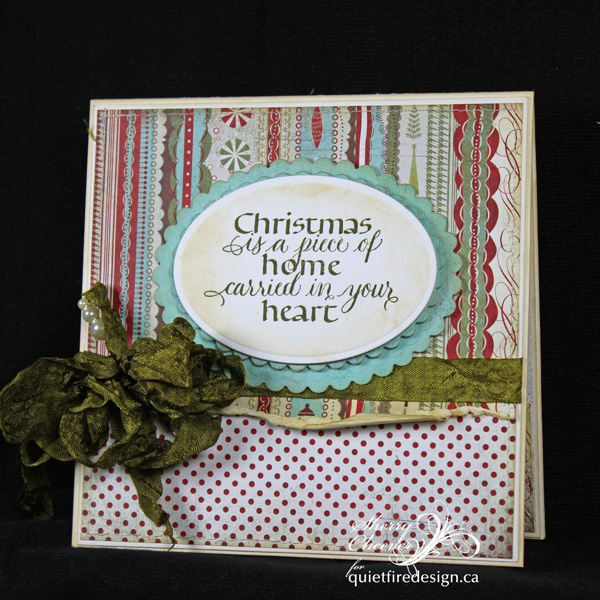
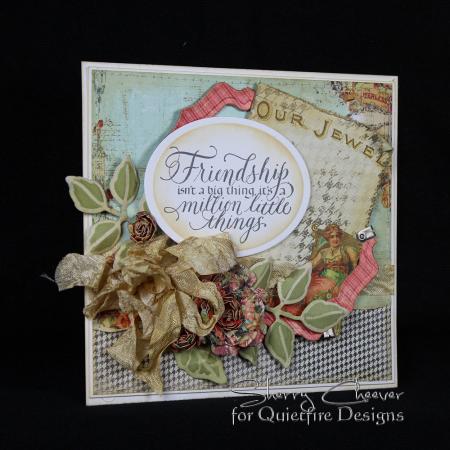
I walked into the studio Sunday morning and cleaned things up a bit. I threw away the trash, put things away and organized a teeny tiny bit. Then I made this card for the Quietfire Creations Blog
I loved the process! I was all in the moment! I didn’t come upstairs until it was done and my photos were made . . . .
Of course, I probably wouldn’t have walked in the studio without the deadline for Quietfire; but quite honestly I’m glad I did. It made me want to play and to create! Finally!! I can’t and I won’t make promises that I’m going to be here everyday . . . but I am going to try to make it once a week. Let’s see how things go . . . It’s all about balance for me . . . trying to find the happy median that will work for me and then work for the others that depend on me to be wife, mother, grandmother, daughter, sister and friend.
Anyhow, I do hope you’ll hop over the Quietfire Creations Blog and take a look at my card. I’m pretty sure it’s going to need some love.
Thanks for stopping by and joining me . . . gee I’ve missed my writing . . .