
Hey ya’ll! Well it looks like it’s gonna be another day that I don’t have time for any fun stamping. Jeanne and I have been working on some projects that need to be done, and I’ve made more cards here in one day that I ever do back home. Jeanne is definitely a stamping machine! When I contemplated doing the Splitcoast Sketch Challenge yesterday, she shook her head at me and said I had assignments that needed to be done. Sorry Roxie, I’ll make it up later!
I didn’t want another day to go by without sharing something with you though, so before I left home I typed up a few posts to have on hand, and this is one project you’ve not seen before.
I needed an altered item for the 3D Swap at the Stampin’ and Pamperin’ Retreat in Cincinnati. I bought the Bind-it-All back in August and this was the first time I was able to play. I have to say, that I am hooked – totally hooked. I cannot stop making little altered books and journals. It is just way too much fun!
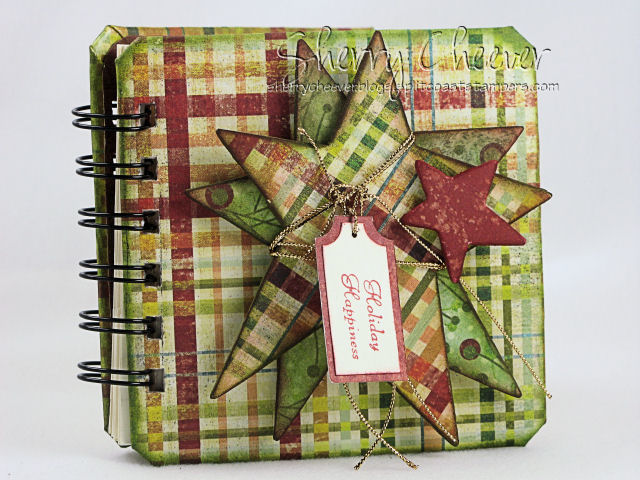
I covered chipboard coasters with Mod Podge and then covered both sides with Designer Paper. The stars were done the same way, except they are covered only on the front. After I cut the paper off around the stars, I sanded the edges and then covered the bare edges with distress ink. After getting the stars done, I thought the little book itself needed some sponging, so I then sponged the same distress ink along the sides of the coasters. The sentiment is stamped on Very Vanilla and then trimmed down to make a tag attached to the stars with gold cord. I wanted something different for the inside, so I made 6 pocket pages so that when a page is flipped, you have 1 bare page and 1 pocket.
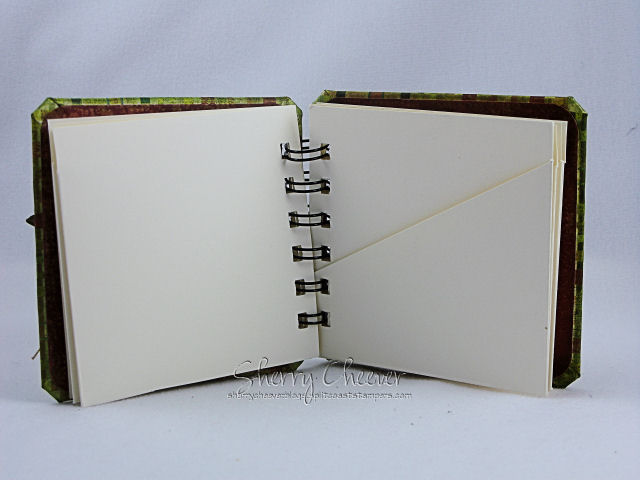
To make the pages, I cut a piece of 8-1/2″ x 11″ cardstock long ways in half. I then trimmed off the longer end to 7-1/2″. You should now have a piece of cardstock 7-1/2″ x 4-1/4″. Turning the paper so that the 7-1/2″ side is horizontal, I scored the sheet at 3-3/4″. Turning the paper vertical, I scored at ½”. Trim the bottom flap off on the left-hand side leaving a ½” flap to fold up and close off the bottom. To make the angle cut, I marked from ½” at the top and then 1-1/4″ from the bottom and cut along the diagonal. To finish the pocket, apply adhesive to the flap and when you fold over to make the pocket, join the 2 pieces together.
Stamps: SU Fancy Flexible Greetings
Paper: SU Very Vanilla, BasicGrey Fruitcake Collection
Ink: Tim Holtz Peeled Paint and Fired Brick Distress Ink
Accessories: Bind-it-All, Mod Podge, Mounting Tape, Gold Cord, Bare Chipboard, 4″ Square Chipboard Coasters, Sponge Daubers
Hope everyone has a great day and more later!


Oh Sherry, you have inspired me to pull my BIA out agian. This is absolutely jaw-dropping gorgeous!!
What a darling little book! I LOVE it!!!
How cute is this! How sweet to have a post ready for us.
The comment about Jeanne steering you in the “right” direction reminded me of my girlfriend whose favorite word used to be “focus”. lol Have fun!
I LOVE that book! Very cool….and gorgeous color choices!
Absolutely beautiful !
Lovely! I love the paper you used!
Wow, Sherry…I love this little book!! What beautiful dp and I love the stars on the front!! Thanks for the inspiration…I have got to make one of these!!
this is great, Sherry! I told DH I wanted a BIA for Christmas! 😉
Adorable. I love this. You guys are stamping machines!!!
I’m hooked on my BIA too! Love the pockets you made on the inside of the book!!! Fantastic!
Wow! This is way cute, Sherry! Love all that wonderful chipboard. I can’t wait to see all the cards you’ve been making, too!
Sherry, this is absolutely gorgeous. I’m so glad you’re having such fun with your girlfriends, and that they are able to keep you focused — LOL. Have a fabulous time!
We must be on the same wavelength, Sherry, ’cause I’m makin’ little notepads with my bind-it-all too!! Yours is simply stunning and I love the Country Christmas feel to it! I did up a couple of them really quickly with kids in mind, using some cute High Hopes stamps on the covers. I took them to work to show some of the ladies and they went NUTS!! Needless to say, I have a list a mile long of special ordered notebooks!! Hahaha!!!
Well, Sherry, if you ever come stay with me, I’ll let you stamp and be distracted all you want! Of course, we won’t get anything that NEEDS to get done completed, but we’d definitely have a good time! Tell Jeanne that you need to PLAY! ; )
Oh WOW — this is awesome!! Thanks so much for sharing it! Hope you get to do some “fun stamping” soon!!! 🙂
Shut up!!! This is stunning Sherry! Love it! Also, I’ve tagged you. Not sure if you’ve been tagged yet or not. 🙂
Oh….I LOVE this one as well! These are so great!!