Smiley from millan.net Good Monday morning!  I hope you all had a fabulous weekend and got outside and enjoyed the weather.  It was great here in Southern Indiana, 70’s and cool at night.  Perfect weather to get out and enjoy walks with the little shitzes!Smiley from millan.net  When I wasn’t outside, I was buried deep in the recesses of the basement working away in my studio.  More playtime!  I could hardly stand it.  I’ve had some ideas running through my head for months now.  I was only waiting for a little time when I didn’t have pressing commitments and time limitations.Smiley from millan.net

Remember this beeswax frame I did for my mother as a Mother’s Day gift?  Ever since I worked on that piece, I’ve been wanting to do another one; and since I’m still on a learning curve, this weekend was perfect! 

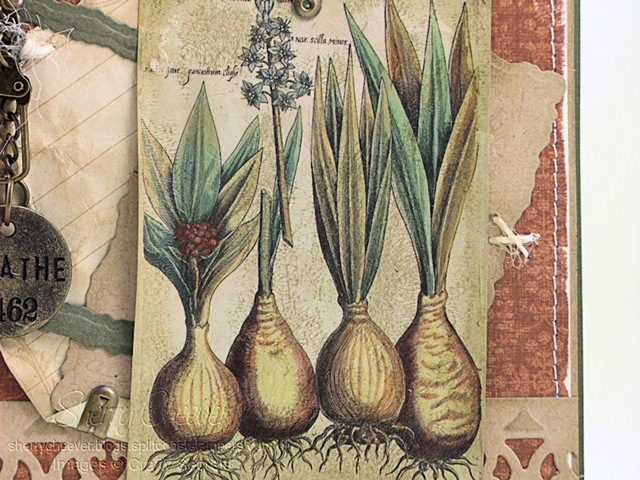
One day at CHA all us girls were sitting at a table resting, and someone from the Graphic 45 Booth walked up to our table.  Because a couple of us had on their buttons, we each received a free packet of Graphic 45 paper.  I couldn’t have been more delighted since I had been longing for the Botanicabella Collection.  I knew deep down that I had a special project for this paper  . . . more beeswax art!

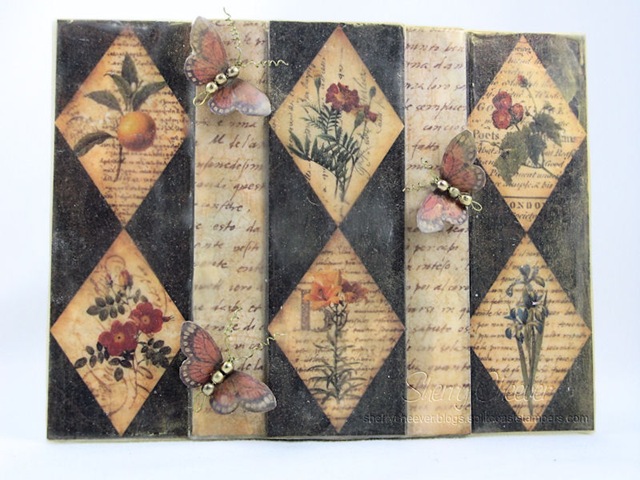
This is what I came up with on Saturday . . . a canvas that was covered with Garden Suite and beeswax.

redoBeesWaxPanel

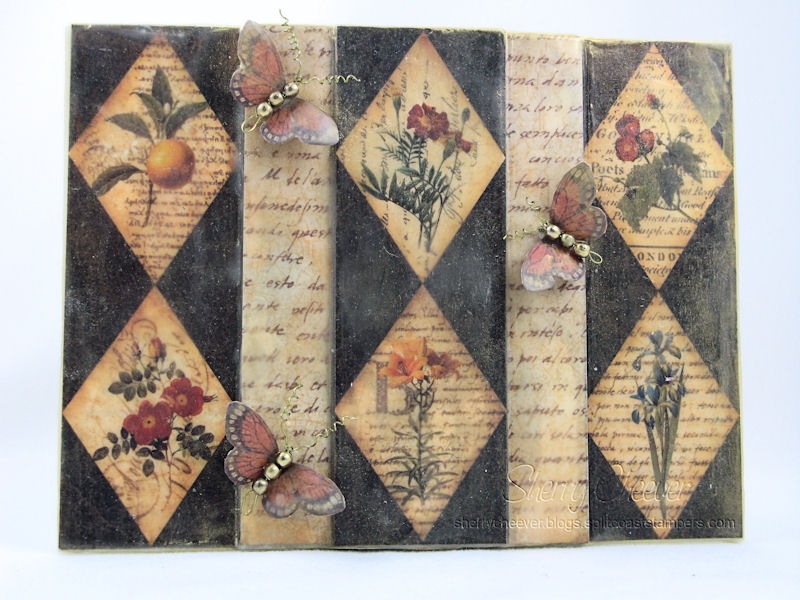
There’s lots of dimension going on here.  I kept adding layers of cardboard to building up bases as I went, finally ending at the top with another diamond panel.  I lost count of how many layers of beeswax I ended up adding.  I sat the canvas up in my sitting room when I was done so that I could keep looking at it and decide if it was done or not.  At first I thought about adding a bow at the top that would hang down the back and let me hang it on the wall.  I also thought about adding some more panels below the canvas, but it was just too thick to punch with my crop-o-dile. 

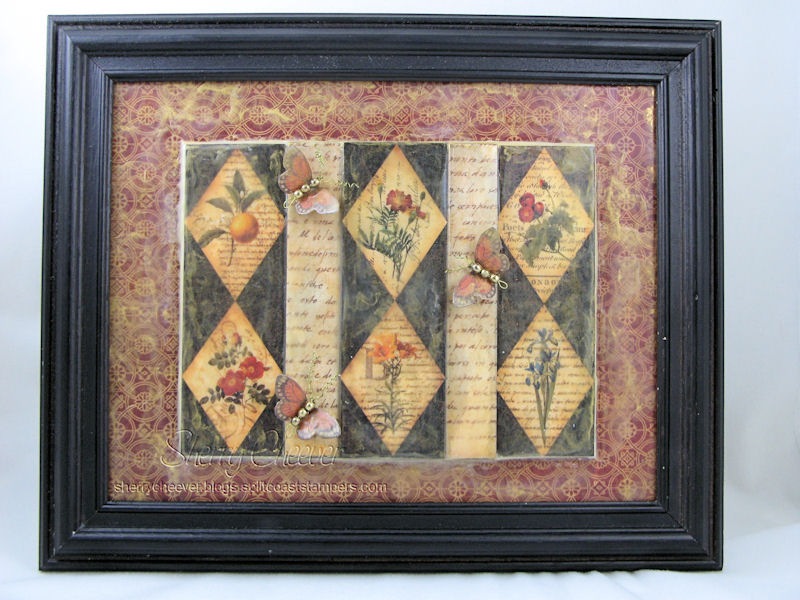
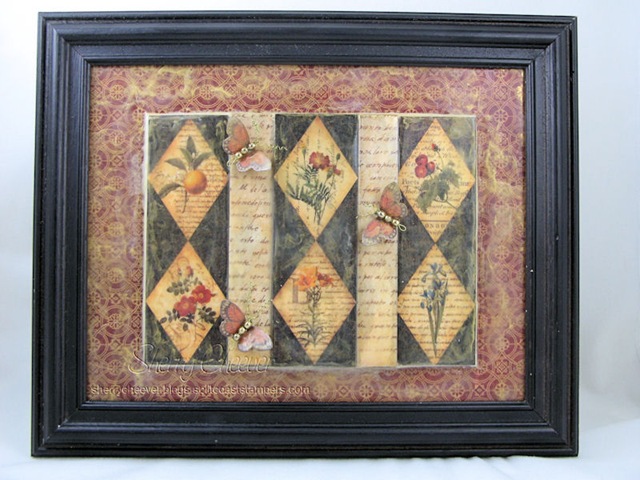
This morning I went out to my spare cabinet in the garage and found the perfect idea for finishing the canvas . . . an 8×10 black frame!  I went back into the studio, picked a piece of coordinating Graphic 45 paper and when to work. 

Here is the finished project, ready hang in my sitting room!

redoBeesWaxFrame

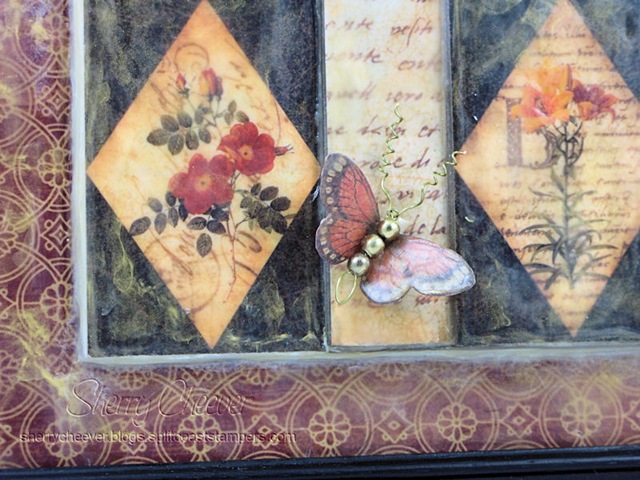
Here’s a close-up so that you can see all the different tiers and panels.

redoCloseUpBeeWaxFrame

And don’t forget to look at that butterfly.  It was part of the paper that I trimmed out, covered with beeswax and then found some old gold beads to add as the body.  I recently purchased some gold wire that was perfect for the antennae. 

I know I need more practice with this technique and will keep working on projects as time allows!  This is such an addicting form of art.

So, that’s all I have for today!  I hope you have a great day and thanks for stopping by!

Good Saturday morning!  I can’t believe that I had the entire day yesterday to spend in the studio and play!  It was so nice.  Remember I told you that I bought arms full of stuff from Papertrey at CHA?  I finally had some time to play with In Bloom yesterday.  I actually have pulled the set out a few times, tried to color it, became discouraged and put it away.  Yesterday everything came together just as I had envisioned.  Trust me  . . .  that never ever happens to me!  Not only that, but my goal was to use these images not in the Papertrey classic style.  You see, I don’t do that style, it’s hard for me and I always struggle with something clean and simple (which is what I consider Papertrey to be).  So my challenge to myself was to incorporate these images into my style.

inbloomaugust21.jpg

The flower was stamped three times, embossed with Queen’s Gold EP, and then water colored with Tombow Markers.  I trimmed each layer out, leaving off a section of each as I went so that they could be layered.  I used the new Spellbinders S4-230 Labels Six for the sentiment and for an extra piece on the bottom right-hand corner.  I also finished the inside so that a personal note could be written.

InBloomAugust21INSIDE

The sentiment is from the Papertrey set, Friends ‘til the End, and I melted the ribbon to make it look more vintage and worn. 

  • Stamps:  In Bloom and Friends ‘til the End from Papertrey
  • Paper:  SU Black; Prism Butter cream; 7 Gypsies Classic Paperie; Arches Watercolor
  • Ink:  Ranger Archival Jet Black, and Distress Embossing, Vintage Photo and Old Paper
  • Accessories:  Spellbinders S4-230 Labels Six; Ranger Queen’s Gold Embossing Powder, Matte and Glossy Accents, Gold Acrylic Paint Dabber; 7 Gypsies Paper Fasteners; Venture Foam Tape; Tsukineko Sponge Daubers; May Arts Ribbon; Papertrey Vintage Buttons; Candle Lighter; Sewing Machine; Tim Holtz Tonic Paper Distressing Tool

I hope you have a wonderful weekend and thanks for stopping by today!

Good morning!  I’ve got so much new stuff in my stamping stash, that I’m going to start using it when time allows.  Oh and because I didn’t go to Colorado this weekend, time does allow!  I guess I should explain what happened about my classes this weekend.  The promoter of the event didn’t advertise my classes and I felt it was a waste of my time to travel.  The same thing happened last weekend and classes were done by word-of-mouth.  Not good and I spent most of my days in the booth restocking product.  So when I was given the choice of going or staying home, I stayed home.  I will however be in Tinley Park, Illinois!

Anyhoo, I was just putzing around in the studio last night, feeling the need to be creative, when I picked up some new stuff I bought from Crafty Secrets.  No stamping on this card, just some fun distressing!

BotanicalBirds

The image is from the Images & Journal Notes Booklet, Birds & Botanicals.  I cut the image from the lined journal notes.  The lined note section was crumpled, inked and then hand sewn to the front of the card.  The image was covered with Ranger Crackle Accents and when dry Old Paper Distress Ink was sponged over the cracks to highlight them.  Here’s a close-up of what they look like.

CloseUpBulbs

Spellbinders Deckled Rectangles were used for some of the layers and the Classic Lace Border was used for the bottom border.  Some Tim Holtz idea-ology hardware was added and a few paper fasteners from 7 Gypsies finishes the card.

  • Paper:  Crafty Secrets Images & Journal Notes, Birds & Botanicals; SU Always Artichoke; Papertrey Kraft; K&Company Bailey
  • Ink:  Ranger Old Paper Distress
  • Accessories:  Spellbinders S7-014 Grand 12” Classic Lace Border and S4-202 Large Deckled Rectangles; Tim Holtz idea-ology Long Fastener, Jump Ring, Swivel Clasp and Philosophy Token; Sanding Tools; Ranger Matte and Crackle Accents; 7 Gypsies Paper Fasteners; Sewing Machine; Tsukineko Sponge Dauber; Papertrey Rustic Cream Button Twine; Sanding Tools

Before I leave today, I have to show you what Kate purchased for her classroom today.  Did I tell you that she is teaching high school chemistry and biology?  Well she is and she’s close to home too!  WOO HOO!  Anyhoo, she wanted something for her classroom and went to the local pet store yesterday and this is what they worked up for her.

terrarium

A total eco system with 4 Dart frogs!

Dart Frog

It is sooooooooo cool!  The pictures above were taken when the terrarium was sitting in the front seat of her car, so there was a little glare, etc.  The thing weighs close to 50 lbs, but look at the great colors of these frogs!  Once again, it is so totally awesome and cooooooooooool!!!!!

I hope you have a fabulous day and thanks for stopping by!

I can’t believe that I finally made enough space for me to stamp.  After the mad rush of CHA projects and then class projects, my work room was a total mess and I couldn’t find a thing!  I’m one of those that have to put everything away when I’m done and my work area clean when I turn out the lights.  When I don’t and things start to pile up . . .  well, it drives me a little crazy!  I also lost my fridge to Mallory and I gained some new stamps and tools when I was in Colorado.  I had to readjust some, so that’s what I did yesterday.  I’m not quite ready to show you pictures or anything yet however.

Since I decided to clean yesterday and not stamp, I never got to the WACKY WEDNESDAY Challenge.  I also forgot I had a meeting last night and had to run out at the last minute . . . no stamping time there either.  I got up this morning ready to stamp! 

WW25

The background papers are BasicGrey Marrakech, that has been sewn to a panel of SU Bermuda Bay.  The border was cut/embossed using the Spellbinders Fleur de Lis Borderabilities using the same paper.  The flower was made from Dusty Durango using the Spellbinders Flower Creations 3.  After the flower layers were cut/embossed, they were covered with Distress Stickles and allowed to dry.  Once the layers were dry and adjusted, a BasicGrey Marrakech brad was used to hold them all in place.

  • Stamps:  Stamp Oasis Petite Word Set Petite Heart SKU:2000-07 from Rubbernecker Stamps
  • Paper:  BasicGrey Marrakech; SU Bermuda Bay, Dusty Concord and Soft Suede; Neenah Classic Crest Solar White
  • Ink:  SU Soft Suede, Dusty Durango, Old Olive and Bermuda Bay; Ranger Archival Coffee
  • Accessories:  BasicGrey Marrakech Brads; Ranger Spiced Marmalade and Peeled Paint Distress Stickles, and Glossy Accents; Spellbinders S4-109HL Flower Creations 3, S4-229 Labels 5 and S4-213 Fleur de Lis Borderabilities; Sewing Machine; Tsukineko Sponge Dauber; Venture Foam Tape

Don’t forget to play along in the WACKY WEDNESDAY Challenge!  You’ll automatically receive a 10% Off coupon code to be used toward your entire order at Rubbernecker Stamps!

Have a fabulous day and thanks for stopping by!

Good morning!  Smiley from millan.net This week’s Rubbernecker Stamps WACKY WEDNESDAY Challenge is being combined with the Color Throwdown Challenge!  Rubbernecker Stamps is sponsoring the Color Throwdown Challenge and we thought it would be fun if the Red-Hot Mommas used their colors while the Color Throwdown designers are using Rubbernecker images.

Dave, Mr. Rubbernecker, has also decided that he would like to thank everyone who has been participating in the WACKY WEDNESDAY Challenges.  He is offering all participants a 10% discount off your entire order.  When you post a card to the WACKY WEDNESDAY Challenge, you will be able to use the code WW25  for one week beginning next Wednesday, the date of WACKY WEDNESDAY #26.  We will continue to give one coupon code for 40% off each week as well!

The color challenge this week is SU Bermuda Bay, Dusty Durango and Soft Suede.  If you don’t have SU but Prism papers, the colors are Vibrant Teal, Desert Coral Dark and Suede Brown Medium.  Linda is the hostess of the WACKY WEDNESDAY challenge this week and you can see her example and get more info on the challenges at the Rubbernecker Blog.

Because of my travels I’m running a little behind this week.  I’ll be back later this morning with my card!  Until then . . .  have a great day!

© 2015 Suffusion theme by Sayontan Sinha