Happy Monday!  WOW I can’t believe that I finished this project today.  I’ve had this vision in my head for some time . . . months and months . . . if not longer.  I might have jumped the gun here too, because I don’t know that this project will ever truly be complete.  I think it’s one of those things that will be added to on a continual basis, particularly if I find just that perfect piece of memorabilia.

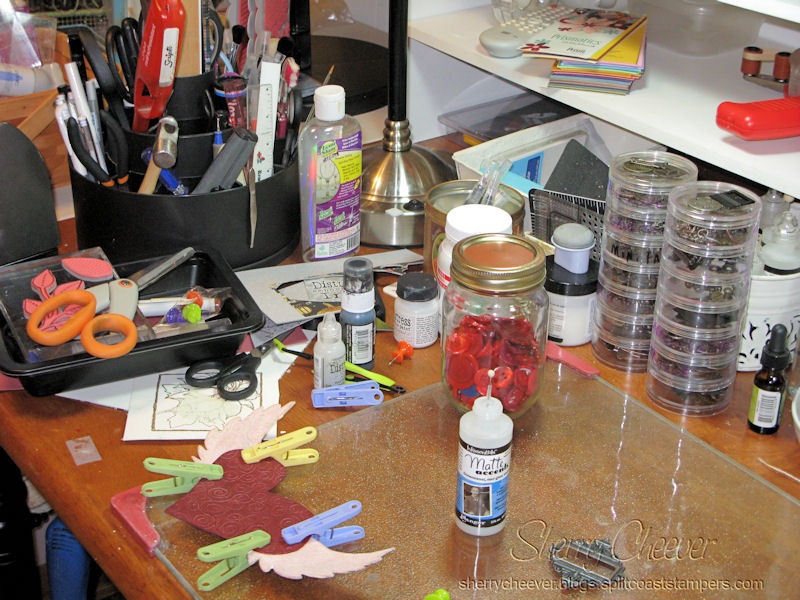
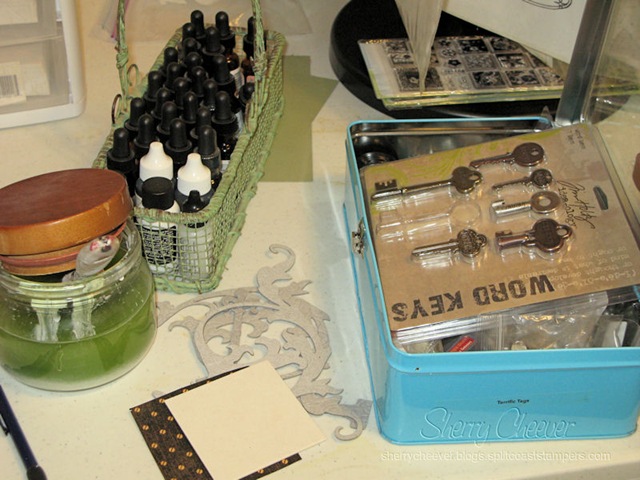
So are you ready to see what I’ve spent the last 4 days working on?  I’ll even tell you what that green goop is in the jar too!  You have to keep in mind that this piece is for me . . . my inspiration!  It’s hanging in the studio right now and as I look straight ahead from the computer I can see it.  I think I’ll leave it right where it is . . . I am so excited with the way it turned out.  Why I’m almost breaking my arm trying to pat myself on the back!

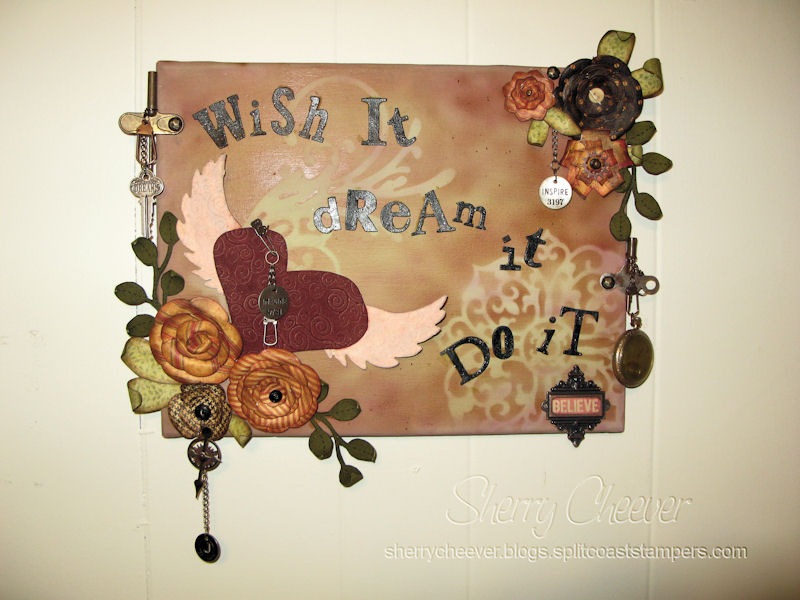
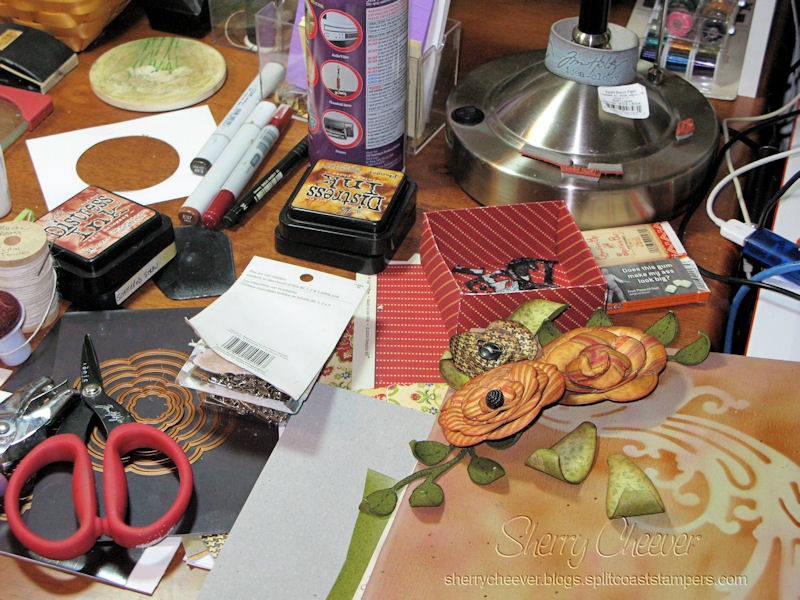
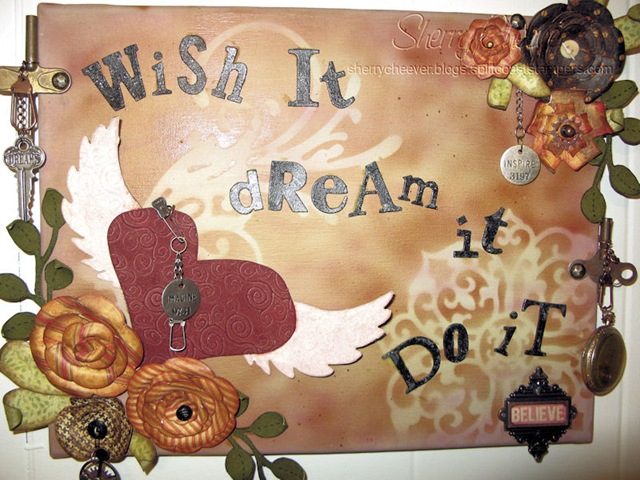
My Inspiration Canvas!
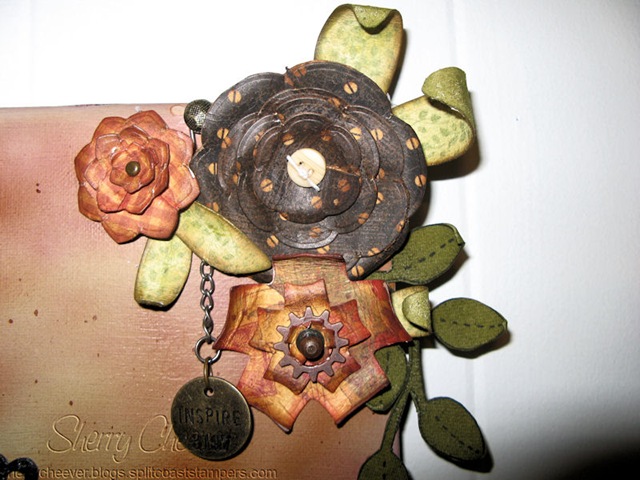
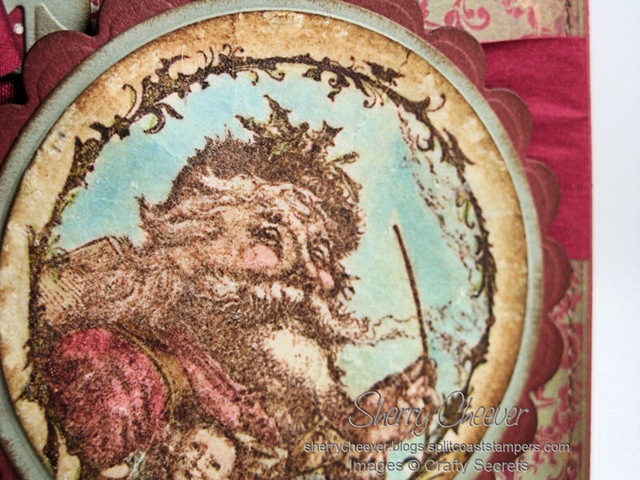
FullCanvas

A closer look.

Canvas

I’ve had this canvas stored in the closet for probably a year or more.  When they have them at Big Lots for a couple of bucks I always pick up a couple just to have around.  To start off, I covered the canvas with 3 coats of gesso.  The last coat was mixed with Peeled Paint Distress Ink . . . the green goop in the jar!  I needed water quickly, grabbed the first jar nearby and poured in some water.  There you have it . . . green goop!  I used one of the Tim Holtz masks and a stencil from Tattered Angels and laid them across the canvas.  Using Copic Markers, I airbrushed over the mask/stencils until I was satisfied with the color of the canvas.  Aged Mahogany Distress Ink was sponged around the edges.    The letters are Grunge Board that were painted black and then covered with Rock Candy Distress Stickles.

BottomLeft

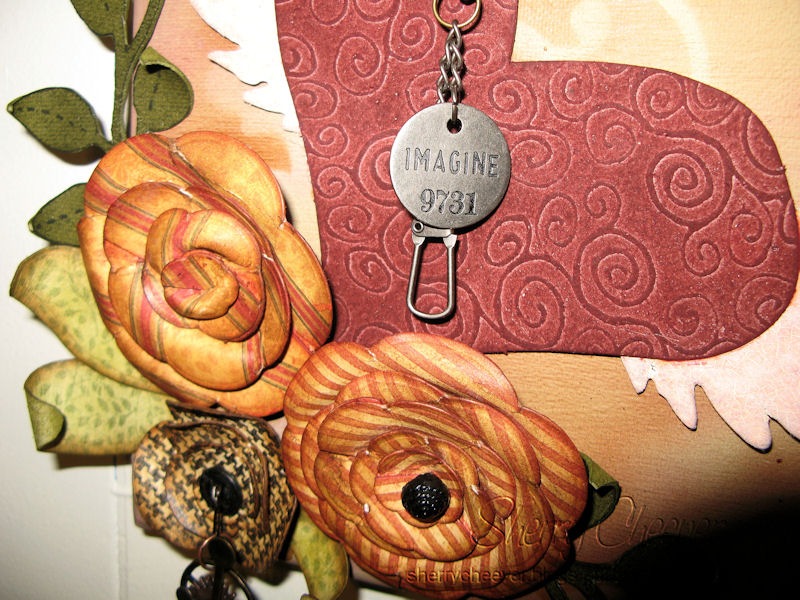
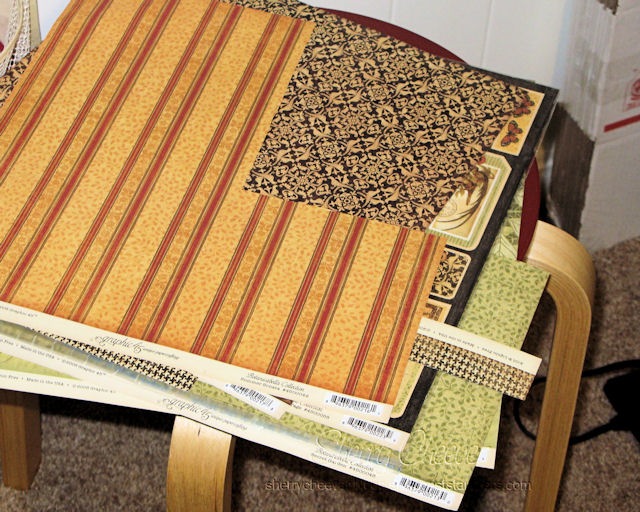
The flowers are Grunge Paper covered with Graphic 45 paper and then die cut with Spellbinders Blossom Nestabilities and Flower Creations 3.  The edges of each individual layer were sponged with Vintage Photo Distress Ink.

TopRight

I added some Tim Holtz idea-ology embellishments through out the flowers for more inspiration.  I also had some clock keys and a pocket watch from things of the grandfather’s.  They were added just because!  I left chains long so that I could add more to them eventually.

BottomRight

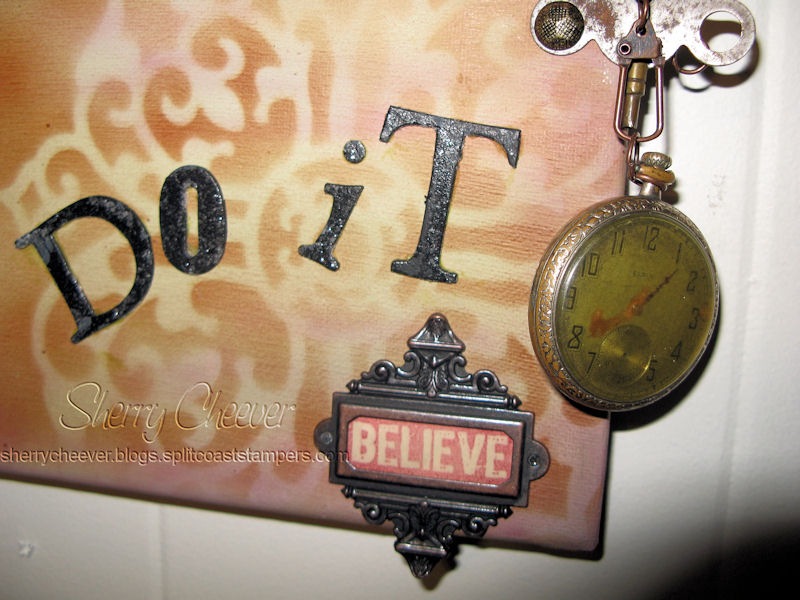
The word Believe and the leaf stems are the only stamps I used.

  • Stamps:  From the Garden by Fancy Pants Designs and Vendy Vechi Studio 490 – Ticket to Art from Stampers Anonymous
  • Paper:  Botanicabella Collection from Graphic 45
  • Ink:  Ranger Vintage Photo, Aged Mahogany, Old Paper, Peeled Paint and Black Soot Distress Ink
  • Accessories:  Spellbinders S4-192 Blossom Nestabilities and S4-109HL Flower Creations 3; Tim Holtz idea-ology Swivel Clasps, Hitch Fastener, Jump Rings, Trinket Pins, Muse Tokens, Game Spinners, Safety Pin, Sprocket Gears, Philosophy Tags, Word Keys, Grunge Paper, Grunge Board elements and mixed minis, Book Plates; Ranger Snow Cap and Pitch Black Acrylic Paint Dabbers, Matte Accents, Picket Fence Distress Crackle Paint, Rock Candy Distress Stickles, Claudine Hellmuth Studio multi-medium matte; Tsukineko Sponge Daubers; Gesso; Upholstery Tacks; Glue Gun, Vintage Buttons; Papertrey Rustic Cream Button Twine

Well, that’s all folks!  Have a fabulous day and thanks for stopping by!

Day 3 of the Process!

PAPER

More mess

REINKERS

I don’t normally work like this

FLOWERS

Can’t find my desk

HEART

At least the floor is clean now

Good Thursday morning!  I’ve got to tell you that so many exciting things have happened this week and I’m just bursting at the seams to tell . . .  only I can’t just yet!

I finally got to work in the studio late yesterday afternoon.  My card today is for the Crafty Secrets Challenge on Splitcoaststampers.  I love this weekly challenge . . .  it has become my favorite actually!  This week’s challenge is to emboss.  Since I can’t dry emboss, I decided to work with UTEE.  The only thing is, I experimented a bit and came out without something totally different than  what I had planned on or even expected.

VintageSantaOct8

I stamped the Santa image in cocoa on watercolor paper and lightly color washed the image with Ranger Distress Reinkers.  Once the painting was dry, I sponged Old Paper Distress Ink over the entire image to age the paper, and die cut/embossed with Spellbinders Classic Circles.  After the image was die cut, I began applying layer after layer of UTEE.  I probably had 4 layers built up when I decided to go one more.  I stamped on some embossing ink, applied Gold Perfect Pearls and then sprinkled on another layer of UTEE.  While still heating the UTEE, I continued to sprinkle on more.  I worked the Gold Perfect Pearls out to the ends and it looked like the edges were gold polished.  However, this is where I took the turn.  Once the UTEE had cooled, I decided to crack it.  Well  . . . . Santa’s face cracked right off!  Instead of melting the UTEE again (which would have been the obvious solution) I decided to peel the UTEE off the image.  What I had left was an image that feels like it’s coated in wax.  It is so cool!!!!  You can still see some of the UTEE and Perfect Pearls on the image, but in the process of peeling it all away . . . the paper crumpled and creased!  It looks even older now! 

Vintage Santa CloseUP

At this point I had all this gold UTEE and nothing to do with it.  Remembering some small bottles I bought back in the summer, I grabbed one and filled it with the UTEE making the UTEE an embellishment.  HAH how cool was that!

  • Stamps:  Vintage Christmas from Crafty Secrets
  • Paper:  Arches Watercolor; Red and Green; Memory Box Spiceberry
  • Ink:  Ranger Archival Coco, Distress Embossing, Old Paper, Peeled Paint, Broken China, Scattered Straw, Tattered Rose, Fired Brick, Weathered Wood, Faded Jeans and Vintage Photo
  • Accessories:  Spellbinders S4-125 Scalloped Circles – Large, S4-114 Classic Circles – Large, and S7-014 Grand 12” Classic Lace Border; Ranger UTEE and Matte Accents; Tsukineko Sponge Daubers; May Arts Ribbon; DMC Embroidery Floss; Sewing Machine; Foam Tape

That’s all I have for right now.  I hope you have a great day and thanks for stopping by!

Happy Hump Day!  October is a busy birthday month for my family.  Not only is it mine and Mallory’s birthday but also my aunt’s birthday month.  Actually my aunt’s is on the 13th and Mallory’s is on the 14th.  I’ve had an idea in my head for a few weeks now on what to make for my aunt’s card.  She’s not the sappy, sweet sort and like funny cards for the most part.  Remember last week when I said I was search for fairy images?  Well it was for my aunt’s card.  I did find a few I liked, but yesterday I found the perfect image.

I recently stumbled upon Mo’s Digital Pencil!  I subscribed to her blog because her images were out of this world fantastic.  Yesterday when Mo’s blog game up in Google Reader, I clicked on through and went to her site.  Of my goodness gracious!  Can this girl ever draw and actually illustrates children’s books.  I bit the bullet and purchased three of her digital images, all fairies.  If you haven’t been to Mo’s Digital Pencil, you need to visit . . . that’s all I can say!

Anyhoo, I downloaded the fairies, brought them in my photo editing software, resized the one I wanted to use and printed it out on Neenah Classic Crest Solar White.

Birthday Fairy

I used Copic Markers to color the Fairy and die/cut embossed the image with Spellbinders Classic and Scalloped Nestabilities.  The background paper was stitched to a second layer and a border made from Spellbinders Scalloped Borderabilities was added.  The sentiment was stamped on white and then cut/embossed with Spellbinders Tags 5.  There’s actually glitter on the wings but you can’t see it in the photo . . . bummer!

Now we get on the outside that this is a Birthday Fairy who has come to wish my aunt a Happy Birthday!  But on the inside:

Birthday Fairy Inside

I truly could not help myself . . .  it’s just way to much fun being me!

  • Stamps/Images:  Happy Birthday from Endless Creations; Say it in Script from Lizzie Anne Designs; and Fairy 2 from Mo’s Digital Pencil
  • Paper:  BasicGrey Wisteria; Papertrey Rustic Cream; Prism Wizard Medium; Neenah Classic Crest Solar White
  • Ink:  Ranger Archival Jet Black and Milled Lavender Distress
  • Accessories:  Spellbinders S4-081 Tags 5, S4-114 Classic Circles – Large, S4-121 Scalloped Circles – Large, and S4-174 Petite 5-1/2” Deckled Scalloped Borderabilities; Copic Markers; Papertrey Vintage Cream Ribbon, Button and Rustic Cream Button Twine; Foam Mounting Tape; Sewing Machine; Tsukineko Sponge Daubers; Computer to Generate Inside Sentiment

I hope you have a fantabulous day and thanks for stopping by!

Oh my BADNESS . . .  What a day I had today!  I thought I would get some stamping in today but . . . and that’s a big BUT . . . the weather was beautiful and there was an auction down the street.  I had scoped out the auction site a few days ago to see what was there and I found two things I was interested in.  One was a jar of old buttons and the other was a box of old papers.  After seeing all the cars this morning and realizing that the race was on at 2:00, I decided I wouldn’t go.  Then around 11 or so I took the shihtzes out for a walk and couldn’t help myself  . . . the draw was too great.  I missed out on the jar of buttons as I only had $40 in my pocket and it went well above that before I knew it.

I waited patiently as they rounded the tables (and there were two rings since there was so much stuff) toward the box I was after.  The Longaberger went on and on and on, all selling very reasonable and sometimes less than the original price.  When have you ever paid $10 for a Longaberger basket?  They soon came up to my box of old letters.   I knew I was in trouble when there was another lady walk up beside me  . . . let the bidding war begin!  $25 later I was the proud owner of this box:

Outside Box of Letters

and on the inside of the box:

Box of old letters

many old letters and postcards with postmarks from 1910 and 1911!  I’m jumping up and down as I write this because I can envision the works of art I can create!

My mother joined me sometime before the box of letters went up for auction, and we had spotted some crystal on some tables we were interested.  Before they got there however, there were boxes (some 3 deep) of glassware, etc.  Before I knew it I had purchased this box of crystal glasses, bowls, etc.

box of crystal

Finally they came around to the other we were eyeing.  I had spotted some Fire King that I really liked and right next to it was a Hazel Atlas piece that I just had to have.  Yes, I LOVE depression glass and have quite a bit that I’ve collected over the years.

Well, here they are

fire king

sitting in my mudroom with the rest of the crystal that I ended up buying in lots for $1 and $5.  Some things I didn’t want but the auctioneer kept adding pieces until someone spoke up.  It was so easy to say $1!

dishes

So am I hooked?  Oh Yeah!!  I might become an auction groupie!

© 2015 Suffusion theme by Sayontan Sinha