
Some time ago, and I can’t remember if it was before CHA or after, Joan Fricker of At Joan’s Garden, asked me to be a Special Guest for one of her blog challenges. So this is what I know (and no, I don’t know what her challenge is). Joan offers up the challenge based on my project and gives you two weeks to complete your project. You can read all about it on Joan’s Blog, At Joan’s Garden . . . how to enter, where you can post, etc. I think there are prizes involved too . . . you need to check it out!
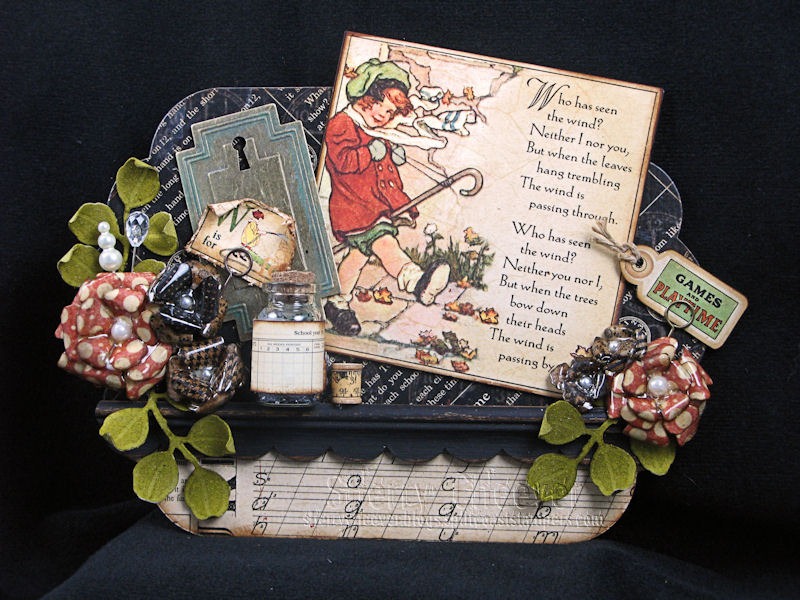
Here’s my project:

To begin, the base is three pieces of printer’s chipboard that were die cut with Spellbinders LF-246 Grand Labels Eleven and then glued together with Claudine Hellmuth Studio Multi-Medium Matte. A piece of Graphic 45 ABC Primer was then die/cut embossed with Grand Labels Eleven and the bottom 2 inches were cut off and flipped over for the bottom border. Both pieces were then glued to the top of the base. The main image on the wall hanging is an image from the ABC Primer that was trimmed down with Spellbinders LF-126 Grand Squares to fit the base. The shelf is made from hobby wood trim cut to size, painted black and then sanded in various spots to show wear and tear. Vintage Photo Distress Stain was then ran over the sanded areas to highlight the sanded areas. The metal tag in the background is from Graphic 45.

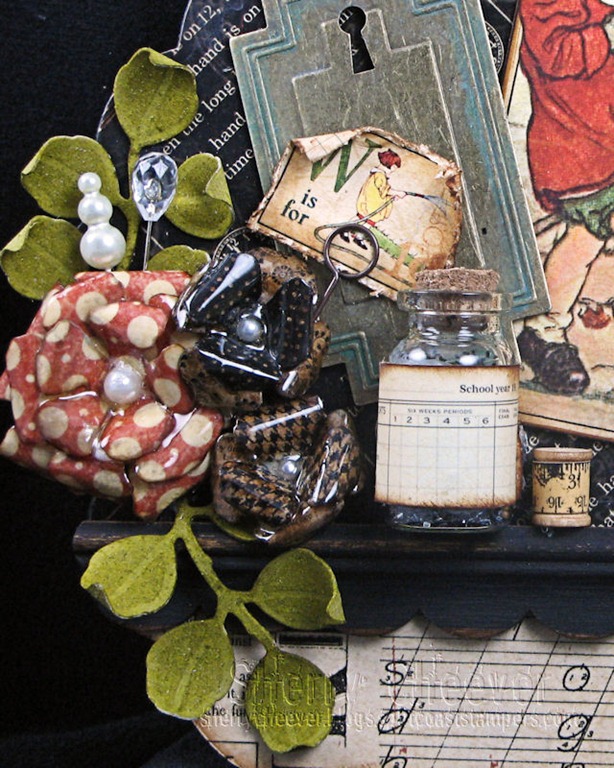
The leaves in the photo above are die cut from GrungePaper using Spellbinders S4-328 Foliage die templates. They were inked on both sides with Crushed Olive Distress Stain and then shaped by rolling the ends of each leave. A strip of a ruler from ABC Primer was wound around a mini spool.
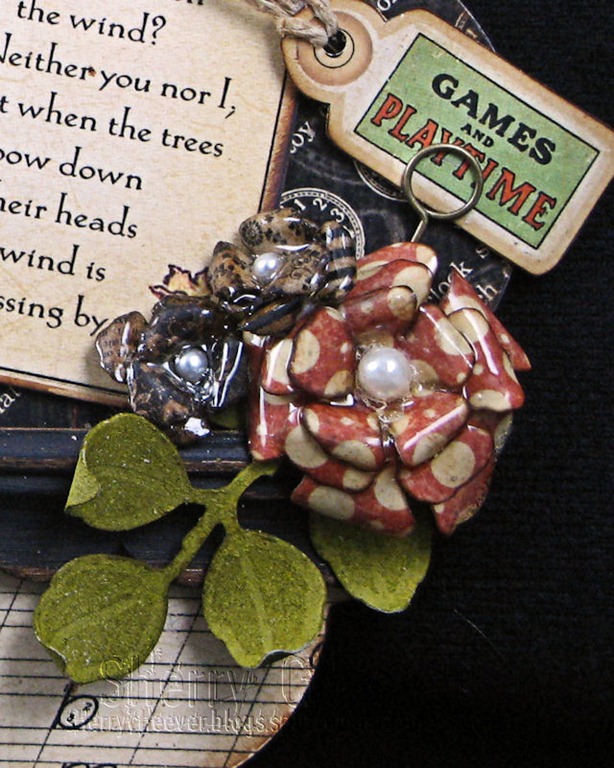
The flowers were made from ABC Primer paper, die cut/embossed with Spellbinders S5-050 Rose Creations, and my Faux Porcelain Technique.
Here is my original Faux Porcelain Flowers video:
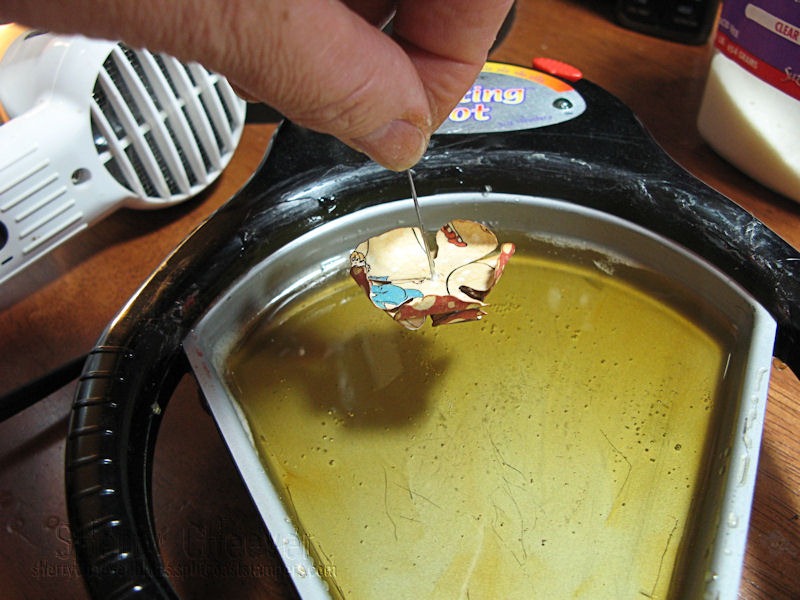
I found for what I make, it was much easier to make the flowers first and then dip them into the UTEE. Here are my flowers made and ready. You’ll notice that I used corsage pins for the center of each flower.

By holding the end of the corsage pin, it is very easy to dip the flowers and then hold them up to drain. I stick the pointed end in a piece of foam then for the flowers to dry.
Here are two that I made from the smallest of the Graphic 45 Flowers.

When I’m ready to attach the flowers, I simply cut the pin off at the back of the flower and glue down with a hot glue gun. I use a hot glue gun on every wall hanging I make . . . especially when using GrungePaper. The hot glue seems to hold embellishments better than anything else.
I’m not going to give the photo links like I normally do on a post because this post is for Joan. All/most items used on this project are available from Joan/At Joan’s Garden.
Project Supplies:
- Paper: Graphic 45 ABC Primer; idea-ology Grunge Paper; Printer’s Chipboard
- Ink/Paint: Ranger Vintage Photo Distress Ink, Vintage Photo and Crushed Olive Distress Stain; Black Acrylic Paint
- Embellishments: Graphic 45 Metal Tags and Flowers; Maya Road Vintage Pearl and Crystal Trinket Pins, Mini Spools; idea-ology Memo Pins; Corsage Pins; Twine; Mini Bottle; Black Glitter; Hobby Wood Trim
- Tools: Spellbinders LF-126 Grand Squares, S5-050 Rose Creations, S4-328 Foliage and LF-246 Grand Labels Eleven; Sanding Tools; Hot Glue Gun; Ranger Matte Accents, Ultra-Thick Embossing Powder (UTEE), Melting Pot, Claudine Hellmuth Studio multi-medium matte
Well, that’s it for me today! Thanks for stopping by and remember . . . life is short, embrace the adventures of your day!


Sherry, I’m going to have to try those flowers – they are gorgeous! Thanks for sharing that technique. The entire project is really beautiful.
Ever since I heard you were going to do this post for Joan, I have been so excited to see what you came up with! This is another gorgeous piece and I can’t wait to try my hand at the challenge! Thanks for clear instructions on what you did!
Sherry, I absolutely love your project and I appreciate so very much that you have created it for our challenge at Joan’s Gardens. Great job!
Also, it was wonderful getting to meet you at CHA last month. Hopefully, someday you an make a trip up to northern Indiana for a visit. Thanks again! I know everyone is going to enjoy your fantastic creation!
Another awesome ‘Sherry Creation’! Love your sweet wall hanging. Your flowers are so pretty.
Thanks for sharing the tutorial! 🙂
What a great wall hanging, I love all your work. Thanks for sharing it.
Gorgeous! Sherry…where can you get the melting pot for the UTEE?
Your handmade flowers are just gorgeous! Thank you so much for sharing how to make them 🙂
You already know that I really like your wall hanging, so am going to say that you have helped with the pearl layering. My stickpins have the largest pearl on top, but yours with the smallest is more attractive. And, I am going to Michael’s today to look for those florist pins. The little brads I have for the roses are too small and the large ones are not attractive. Thanks, Sherry; you really do inspire your readers to improve their projects.
Hi Sherry, the project is great and you are so cleever,LOL This is really good and I can’t wait to try it. I’ve got to get busy now and get things cleaned up so I can start all the fun things that are happening on these blogs.
Hope to see you soon.
Hugs and God Bless
Thank you so much for sharing how you made these flowers-they are so awesome!! Pinning!
Always fabulous work Sherry! The flowers are terrific….so much that t!m did them at CHA!!! Thought of you when we were doing them in class. You’re Genius!
~Linda
Sherry, you are a genius crafter. I love how your brain works to put everything together to create such awesome projects.
Such an amazing project! This turned out fantastic!
Just adore this wall hanging – thanks for the UTEE tip – will have to try it
Fabulous work Sherry. I just love your wall hangings. I do have some questions thou so I will e-mail you with them. Thanks so much for sharing your talent with us. Joan is very lucky!!
Marcie
[…] from Graphic 45 Fashionista Le Fleur and Buttons A La Mode, shaped and then dipped in UTEE for the Faux Porcelain Technique. The center of each flower is a corsage pin that was colored with Lemonade Alcohol Ink. The […]
[…] course I could envision my “sister” keeping this box so I had to make the flower faux porcelain. I think she liked the box . . . she did say it was […]
[…] the tutorial which includes a new revised tutorial on Faux Porcelain and another on how to cover a bare frame Bad Sherry […]