
Hello!!!!
I finally got up the nerve over the last few days to try something I’ve been wanting to do for some time now . . . make a necklace using the Spellbinders® Media Mixáge™ Bezels and Susan Lenart Kazmer ICE Resin®. I’ve had ICE Resin for a couple of years now . . . ever since I saw it the first time at CHA. I’ll never forget walking in the booth with Daisy Sparks and Wendy Vecchi . . . AWEstruck! We all purchased her books with (I know) the good intentions of giving it a try. So I guess it’s better late than never on my end!
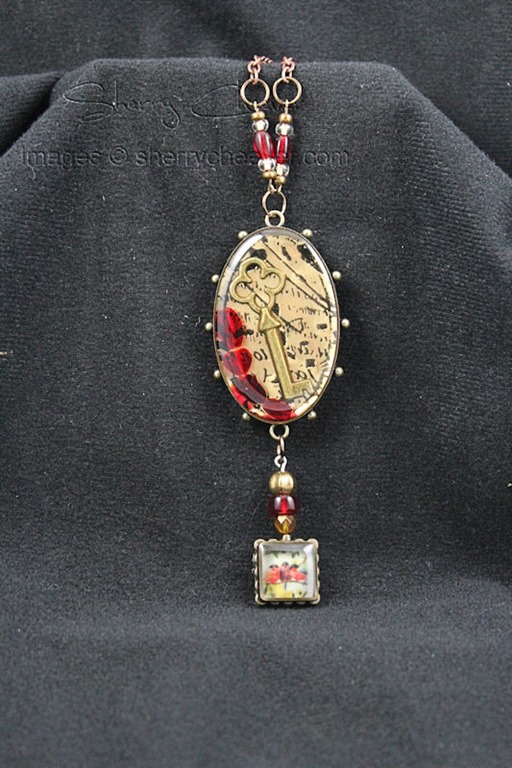
Lookie . . . I added a chain with a magnetic closure too! I’m really planning on wearing this and get this . . . Mallory said she likes it well enough to actually wear it . . . I guess I did good!
So let’s talk about the many details . . . starting first with the larger pendant.

That’s the larger of the 3 oval Bronze Bezels from the Spellbinders Media Mixáge line. The background is a piece of gold foil engraving board that was die cut with MD1-001 Ovals One and then embossed with the new Poetry Engraving Plate. Using a sanding block I sanded away the areas that weren’t embossed. Now whether I did the embossing correctly or not, and I’m not entirely sure, because when I sanded it all away, the embossed areas were much smaller and embedded into the board. I didn’t try flipping another piece because I kinda liked the look of this one (I’ll try the other way at another time).
The die cut oval was glued to the bottom of the bezel and then the key was added over the top. I started filling the bezel with ICE Resin and decided at some point that it really needed some color. Before I had finished pouring the dome, I started dropping in some red beads that I had in my stash.
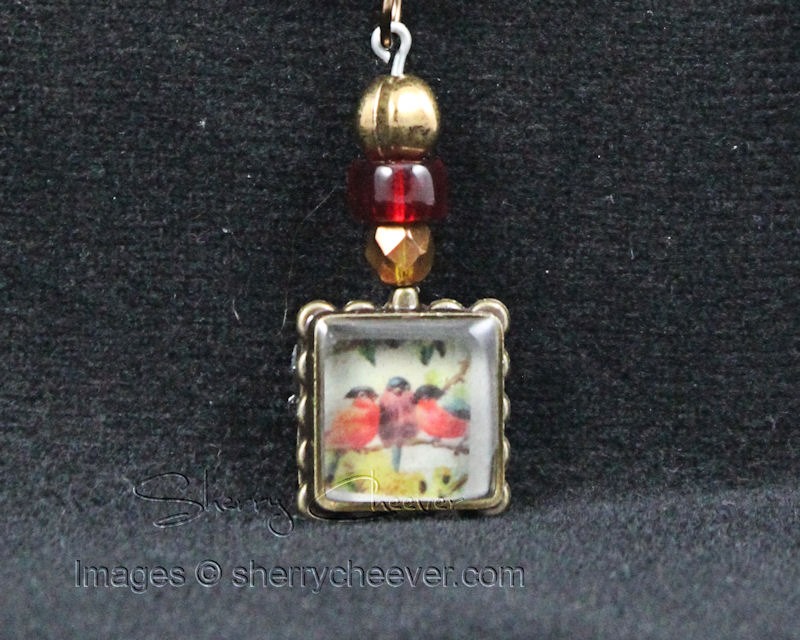
The smaller pendant is Spellbinders new Square Hatpin Bezel. An image was die cut using MD1-002 Squares One (the #1 die template) and glued to the bottom of the bezel. I turned the hatpin upside down to use it as a charm, adding beads on the pin and hooking it to attach to a jump ring. The bezel was then filled with ICE Resin. (Important info: let the ICE Resin sit overnight before moving the bezel . . . VERY important info! I think I might have poured this smaller one first and while I was dropping beads in the larger bezel I kept reaching for a pin to help push down the bead. Can you guess what happened? Well of course I did! I kept picking up the hatpin . . . spilling resin all over my work space as I went.)
Once both pieces had dried overnight, I started adding the jump rings, chain, etc., to finish off the necklace. The ICE Resin wasn’t nearly as complicated as I thought it would be and the process really didn’t take that much time. I’ve been a little hesitant on trying the ICE Resin in this way . . . but don’t be! It truly is a wonderful product and not nearly as difficult as I first though!
(and actually, while working on the necklace this afternoon, I mixed up some more ICE Resin for a project I’m hoping to have together tomorrow)
Whew! I guess that’s all I have for right now. Thanks for stopping by today and remember . . . life is short, enjoy the adventure!

Project Supplies:
|
|


WOW Sherry! This is awesome! I love it! Can’t wait to see what you come up with next…you always have your own personal cool spin on things! And you are right…ICE Resin is easy to use! I was surprised the first time I tried it!
It is a delightful piece. I just wonder, could you use the resin over a photo picture (as in grandbaby)?
Sherry. Very nice. I’ve been sitting on the fence on this product, I just may have to jump down and give it a go. Love the little birds.
I’m super impressed with your necklace! I make jewelry, but have never tried ice resin. Way to go!!
I love it, absolutely Gorgeous, like the idea of adding the beads inside to give it a little color and sweet pic for the pin
These are gorgeous Sherry must try and get some ice resin
Hi Sherry this is stunning.
Smiles
Ita
Sherry you did great! Very lovely!! I want to try these too… I thought it was a great idea to see a hatpin used in that way!!