Sherry Cheever

Hey y’all!  I know I’ve been away for a week or more, but I had a few days of feeling under the weather and then . . . of course, when I have the grand baby . . . well there just isn’t any time for work!  I’ve got some big projects coming up, and I’m toying with the idea of some new directions . . . we’ll see!

Here’s a little peek of a card I have posted over on the Quietfire Creations Blog today . . .

YouNeverKnowCloseUP

It’s clean and simple for me, so I hope you visit me at Quietfire to see more photos and get the details.

Thanks for checking in here today!


SHERRY SIGNATURE

Okay . . . I have to admit . . . I’m hooked on Color Burst!  Ever since I opened them and started playing, I can’t stop.  I’m like a kid in the candy store . . . let’s try this and let’s try that.  It’s an addiction and one that you don’t want to quit!

When I left CHA, Ken gave me a hand full of backgrounds that he had made during this demos.  The background for my card today, is one that he made!  After I finished my watercolor of the flower, all the backgrounds I had made were just too light and this one from Ken had just the colors and boldness needed.

OrangePoppy

The image (an older Hero Arts from my stash) was water colored with Orange, Lemon Yellow, Alizarin Crimson, Ultramarine Blue and Athalo Green.  The seam binding was dyed by using Alizarin Crimson and adding just a touch of Lemon Yellow.

OrangePoppyCloseUP

The tag was made from the same background paper and Ken’s new Pegz Stamps, Uppercase Alphabet.

OrangePoppyLEFT

I used some (new to me) Tonic Studios layering dies to make the card:  Squares for the background and Circles for the image.  I settled on black for highlighting the image, but I couldn’t leave well enough alone and added some white doodles.  It’s been a very long time since I’ve done that!  Nothing like playing and getting back to one’s stamping roots.

OrangePoppyRIGHT

I think that’s all I have.  Truthfully I got sidetracked while I was writing this post and now I’m back about 3 hours later with no train of thought left.

All I can say is . . . thanks for stopping by!

SHERRY SIGNATURE


Project Supplies:

Good morning y’all!  All weekend, I’ve been playing with Ken Oliver’s new product, Color Burst!  I have to admit that I messed with Color Burst a little at CHA, and watched Ken for hours making backgrounds (distress without the mess) and showing us the ins and outs of the product; but until I actually got it in hand and started playing with it myself . . . Well, Oh My BADness!

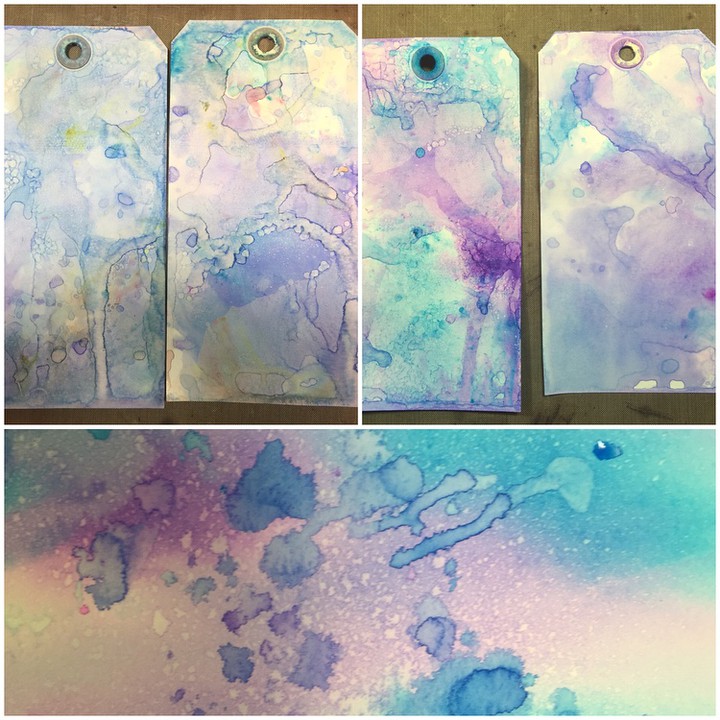
First thing that took me by surprise (and I truly can’t believe that it did), was that it’s a powder.  A very concentrated powder . . . why did I not realize this at CHA?  I have no earthly idea!!!  Maybe it was the fact that I watched Ken mist the paper and then sprinkle on the Color Burst . . . and it immediately burst into color all across the page.  Then he would mist it with water and it would spread even more . . . Yes, call me a ditz!  The first time I used it here at home, I had to ask my other teamies if mine had dried up or was it actually powder . . . okay slap my forehead!

I know I’ve mentioned this here before, but the first few things that ran through my mind when I saw Ken work with Color Burst was Faux Batik and of course, distress without the mess.  One thing I played with this weekend was using Color Burst for a “Layered Textured Wash”.  I misted my craft sheet with water, sprinkled on the Color Burst, misted with water again and watched the color “burst” on the craft sheet.  I tried watercolor paper and then white coated tags.

988946_10153344923395839_1303161359888974131_n

As I picked up color each time I was amazed that no matter how muddy my craft sheet looked (ink pooling all over the place), when dried on the paper the colors didn’t muddy!  I LOVE it!!!

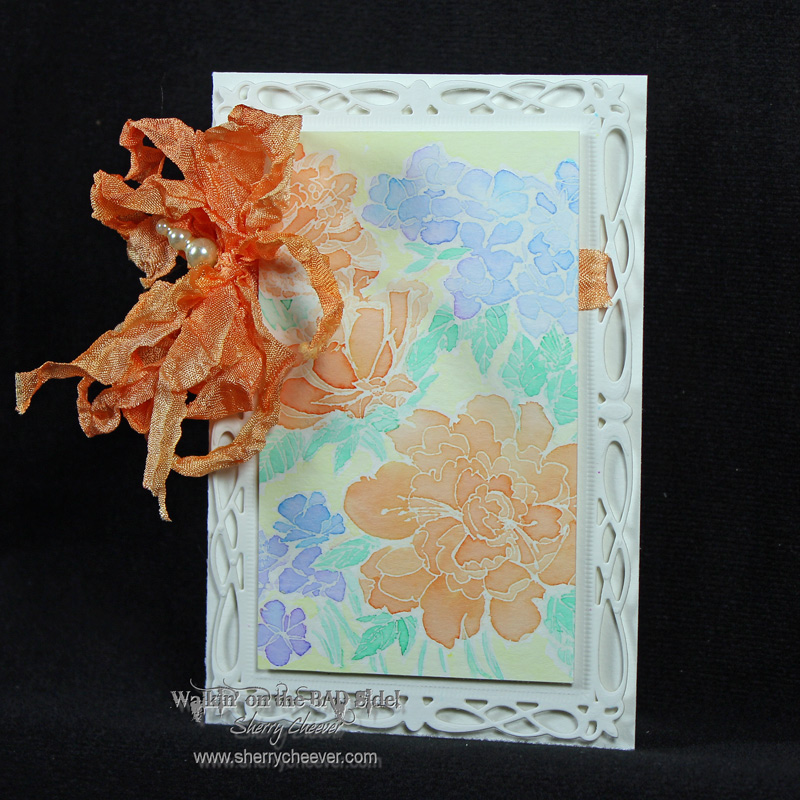
One of the other things I thought of immediately was the Faux Batik Technique.  (That link is to an old tutorial I did using alcohol inks . . . I think I need an updated video!)

SpringGarden2

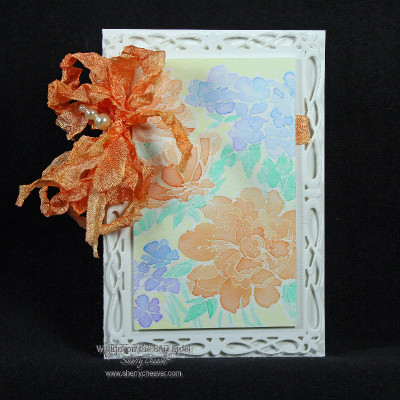
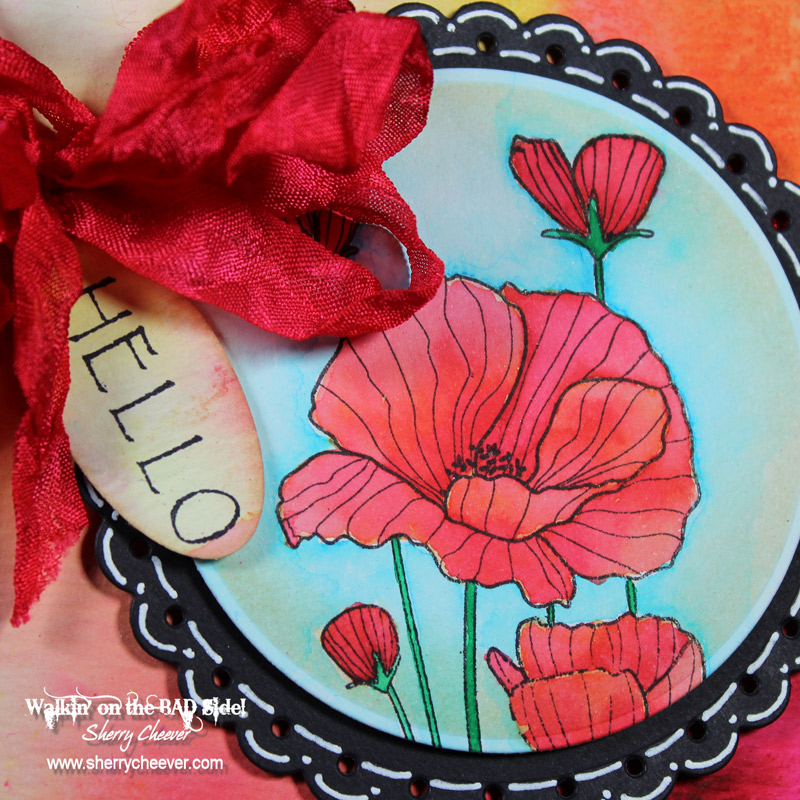
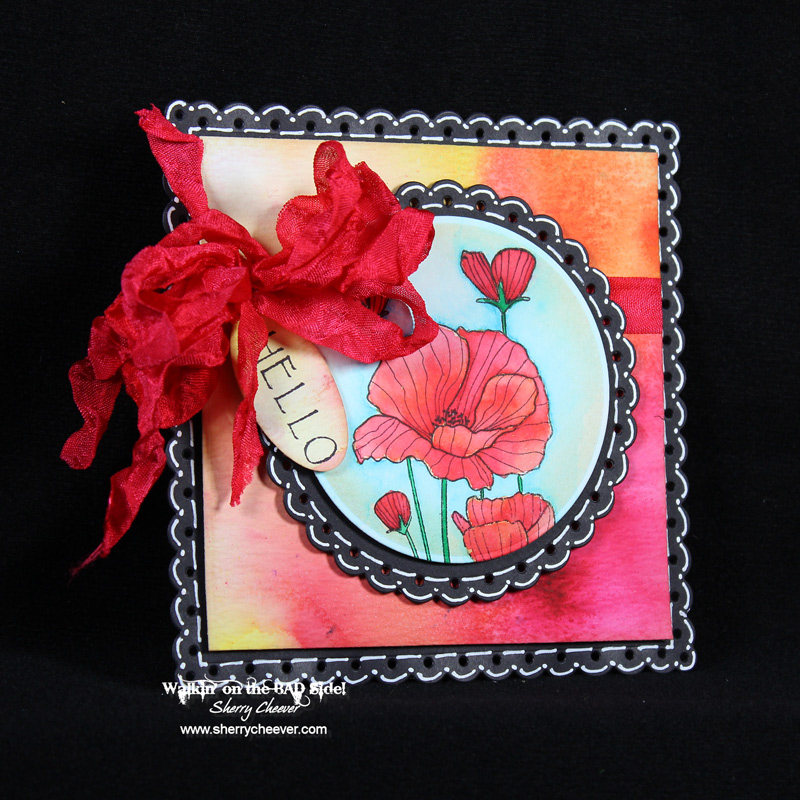
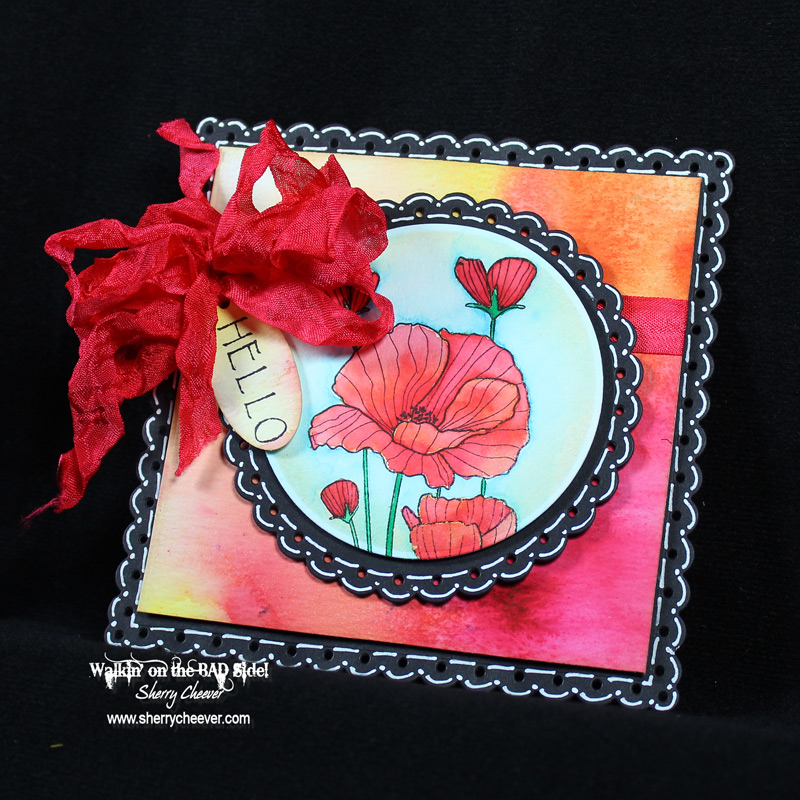
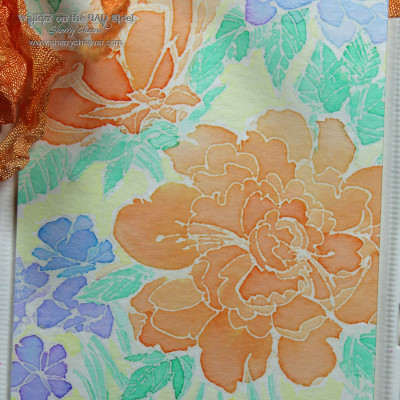
This card is really very simple to do.  The image was stamped with VersaMark on watercolor paper and embossed with clear embossing powder.  Using Color Burst to watercolor with, the image was watercolored and when dry, the embossing was removed with a craft iron (see tutorial or either video) creating the Faux Batik.

SpringGardenCloseUP

The seam binding was dyed with Orange Color Burst to match the color in the flowers.  I haven’t made any mists up yet, so I misted my craft sheet with water, sprinkled on the Orange Color Burst, misted with water again and dropped in my damp ribbon.  As I dried the seam binding, I continually picked up the color off the craft sheet.  Love all the shimmer and different shades achieved with the Color Burst!

SpringGarden

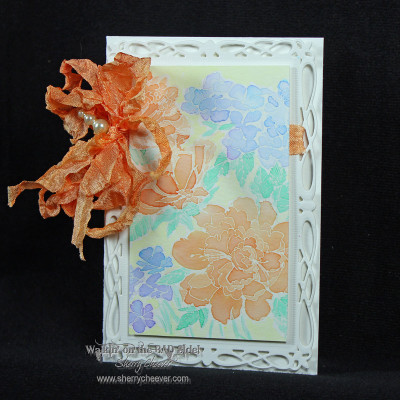
A background for the image was die cut/embossed from watercolor paper with Romantic Rectangles.  The image and the card base then trimmed to fit the die cut rectangle.

By the way, the stamp used is Stampendous Garden Background.  I’ve had it for a few years and when I searched for it online, it’s not on the Stampendous website.  I did however, find it at Frantic Stamper, Amazon and 123Stitch.

That’s it y’all!  Thanks for stopping by and visiting with me today!

SHERRY SIGNATURE


Project Supplies


Good morning!  Hope everyone is staying warm and you’re not buried under feet of snow.  We’ve had our first major snowstorm for the year and it’s been bitterly cold . . . let’s hope it warms up for all of us soon!

During the last month, I’ve been working on some favors for my sorority province meeting . . .  wish I had gotten a picture of the completed box.  I die cut and made some fabric flowers that were attached to the front of a take-out box which we put a few treats in.

I’ve also taken the time to organize and clean my work space.  I’m so glad I did . . . I finally feel that I have a room that suits me and that I actually like working in.  (If you follow me on Facebook, you can see all the photos there!)

I have a few projects in the beginning stages for Ken Oliver using his new products.  Love his new Color Burst!  These will be hopefully finished over the upcoming weekend and I’ll have a few things to share next week.

The last few days I’ve been working on a project for Quietfire Design.

ArtisanFrameRTscs

I used lots of old product that I’ve had in my stash for some time:  An old Darcie’s Offset Square Shadowbox Frame, GrungePaper, Tattered Floral die (I know . . . don’t faint).  I also used some new Graphic 45 paper I picked up at CHA, Artisan Style, and a Quietfire stamp.  Please hop over to the Quietfire Creations Blog, check out all the details and more photos.  I would love it if you could leave me a comment over there and let Suzanne know you visited!

Thanks for stopping by today!

SHERRY SIGNATURE


Project Supplies:

Good morning!  I’m sharing a card over on the Quietfire Creations blog today using the set, Always Be My Friend.

FaithfulFriendRightW

You can find more photos and all the details over there . . .  BUT what I did not tell you about there is . . .

I used some new Tonic Studio dies!

If you were following along during CHA, there was a big buzz that Tonic Studios will be coming to the USA.  They’ve been in the UK for some time, but with this past CHA they are bringing their dies and other products to the US.  Check out the Tonic Gold site for lots of ideas and resources and/or you can find Tonic Studios USA on Facebook here.

I’m almost done with all my flower making, so hopefully I’ll be hitting the studio in the next day or so to work with some of Ken Oliver’s new product, Color Burst.  You are going to LOVE it!

Thanks for stopping by!

SHERRY SIGNATURE


Project Supplies:

© 2015 Suffusion theme by Sayontan Sinha