One of the big projects I worked on over the Holidays, was a special gift for a family member. Before I give you the project though, I would love to share some back story.
My grandmother was the oldest of 9 children. She passed away in the early 80’s never having the opportunity to see my girls, her great-grandchildren. Her mother, my great-grandmother passed away in 1985 . . . I was pregnant with my oldest at the time. My grandmother has one sibling still living (age 86) and I get to see my Great-Aunt and her family once a year at our family reunion. Luckily, I have been able to connect with a few of her children on Facebook and we can stay in touch more than simply at the reunion. This past year, my Great-Aunt and Uncle celebrated their 70th anniversary! One of my cousins who I have contact with on Facebook and who has seen my cards, canvases, etc., asked me to make something special for her parents’ anniversary.
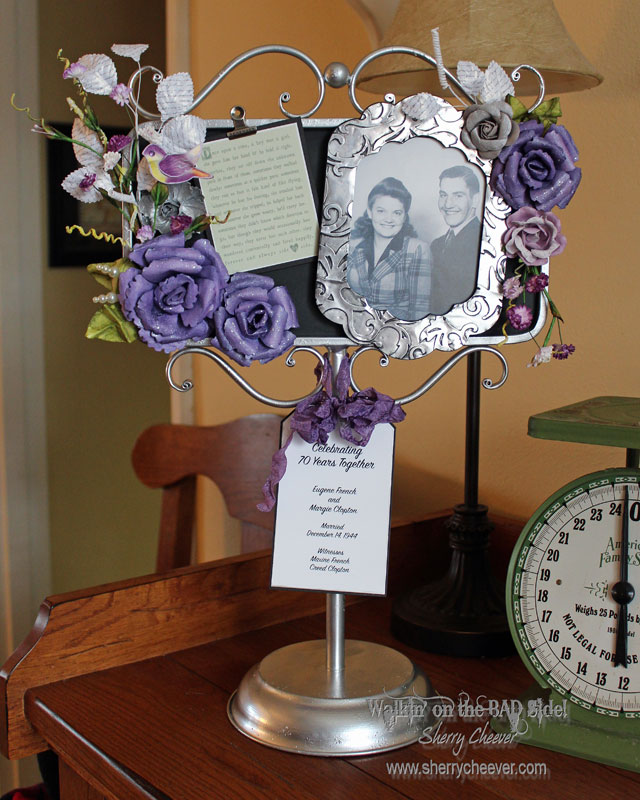
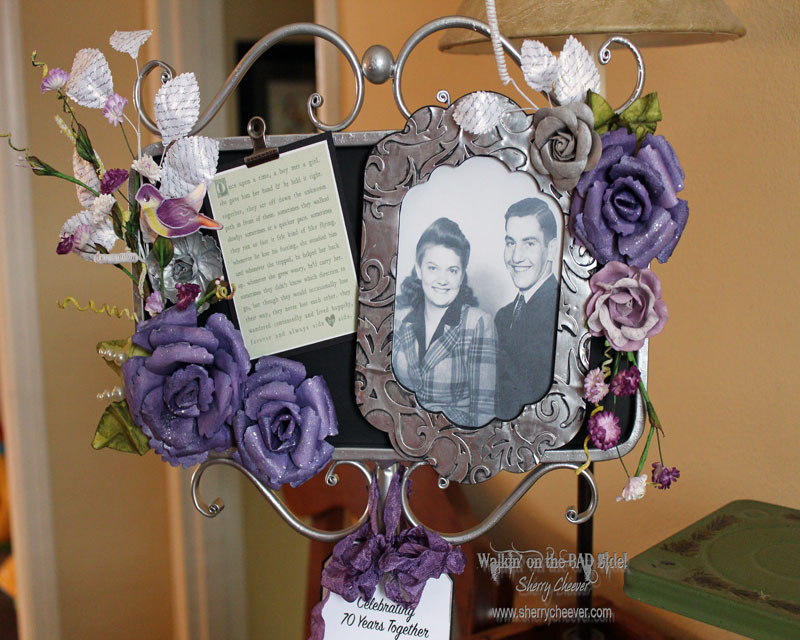
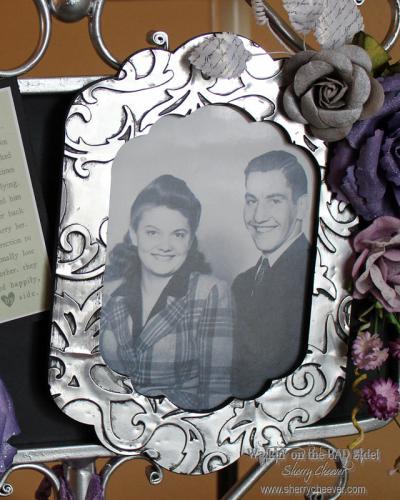
We talked a little at the reunion this past October to firm up what they were going to do. Since it was their 70th and platinum is the standard gift (and difficult to find), they settled on the colors of silver and purple. They scanned and sent me a picture they had of my Aunt and Uncle when they were both young and starting out.
Knowing this project was for such a special occasion, I wanted it to be fabulous. After thinking about it for more weeks than I want to admit, I went to work with my heart and soul to create something that would pay tribute to my Great-Aunt and Uncle.

The stand is one I found at Hobby Lobby. It was black and I believe the center might be a chalkboard. I couldn’t say for sure, because I just didn’t think to write on it to find out. I spray painted it silver, leaving all the rough texture from the distressed black.
Since I had the picture, I needed a frame. Numerous pieces of chipboard were die cut, glued together to make a deep frame. A piece of silver metal was then die cut, embossed with an embossing folder and antiqued to add just a tad of aging.
Most of the flowers are from Prima, but in order to add some balance and fill space, I die cut and made the larger purple roses. I also found a poem that I printed out to celebrate the many years of the marriage.

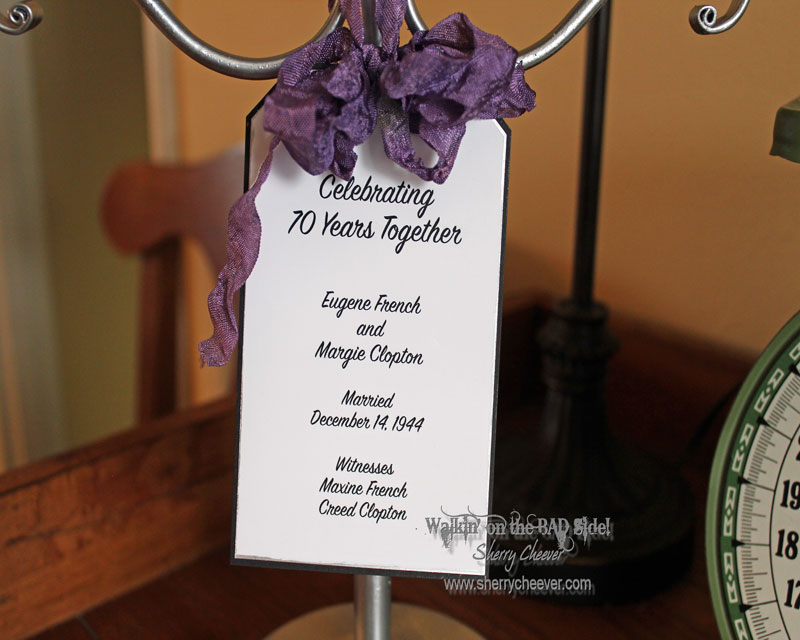
A tag on the bottom, computer generated and backed in black, was attached with dyed seam binding, to commemorate the occasion.

I think that’s all . . . except to say what an honor it was for me to create this special gift to help celebrate my Great-Aunt and Uncle. In some small way I was also able to honor my grandmothers. As I stood in the shower the morning I was to deliver the gift, it occurred to me that my grandmother, if still alive, would be 103 years old this April!
My next big project is to make 50 fabric flowers to be attached to take-out boxes for an event the first weekend in February! Stay tuned . . . they are of course, fabulous!