Good Monday morning! I hope everyone had a great weekend and enjoyed the Super Bowl Game. The kids came in and watched the game, while doing their homework. They also brought my cabinet from the river. It needs a coat of paint but in order to get things organized before I leave next Saturday, I went ahead and loaded in the SU stamps.

China Cabinet

Anyhoo, you can see how it is going to look in the room. If I remember correctly, my mother used this cabinet as a china cabinet when we were younger. My sister, Carrie, tried to climb it and it fell on top of her. I don’t think she was hurt and I can’t remember if anything was broken. Maybe she’ll chime in here and let us all know!

On an exciting note today, Rubbernecker Stamp Company announced the January winner of the $100 Rubbernecker Bucks yesterday. CONGRATULATIONS KELLY FIGLEY OF NEW CASTLE, PA!!!!!

I checked out the Try a New Technique Challenge on Splitcoast this morning and even though it looks like a fun one, I just don’t have time to participate today. However, I do have some stamping to share with you. One of the new sets released by Lizzie Anne Designs recently is Far East. I have to say I absolutely love this set. Luckily I still had some BasicGrey Blush left and it all goes so well together.

Far East Cherry Blossoms

I cut the ovals out with Nestabilities first, and then stamped the tree branch in Jumbo Java on Very Vanilla cardstock. The flowers were stamped over the dots on the branch in Pixie Petunia. I eyeballed them, which is why they are a little off-center in some spots. Not only that, but the final version was maybe the fifth try. The card is 4 x 6.5 and will fit in a standard letter size envelope. I don’t know why I didn’t think about using the square Nesties to cut out the layered scallop, probably because I have just started using them more. Next time I’ll remember!

Stamps: Far East from Lizzie Anne Designs

Paper: SU Very Vanilla and Chocolate Chip, Prism Island Mist Light, BasicGrey Blush

Ink: VersaMagic Pixie Petunia and Jumbo Java

Accessories: Nestabilities, Fiskars Cloud Edged Scissors, Ribbon, Mounting Tape

Here’s the product I used to make the card.

Feb 3 Product

If anyone knows where I can get a good deal on Nestabilities, I would love to hear about it. I need to add to my collection.

Good morning and welcome to my Rubber Room! As promised, you will receive the grand tour today! But first, I have some Tawdry Treats to give away! I went to Random.org and entered my sequence numbers and No. 33, came out on top! CONGRATULATIONS Linda Anderson a/k/a studbo, you are the Tawdry Treat Winner! I have already sent an email to you with all the information you need. If you don’t receive it, please send me an email.

A week in the making, a bit more to move in, but here it is, RUBBER ROOM REMODEL!

As you come in the entrance,

Entrance

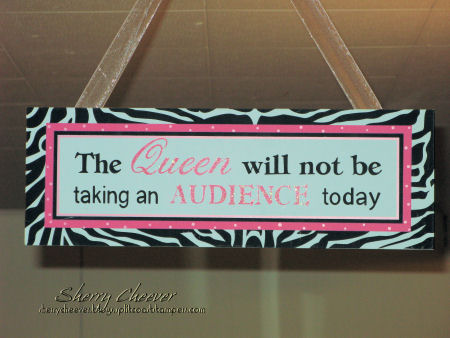
Please take note of the sign above the door. My best friend, Bad Bev, gave this to me as a Room Warming Present. I doubt I’ll ever have the door closed, so it has to prominently hang for all to see!

Sign

To the right is the bookcase Lance’s Grandfather made. I have adorned it with all my stamping mags, books and little books I like to have on hand for witty sentiments. My Grandmother’s lamp sits on top, along with Boozy Floozy. Boozy Floozy is a little bank that Mallory brought me back from her trip to Europe. She knows her mother so well!

Bookcase

Across from the bookcase, is my storage closet. Luckily the white shelves were there. The black shelves where in my prior room, which I broke down and placed side by side for additional storage.

Closet

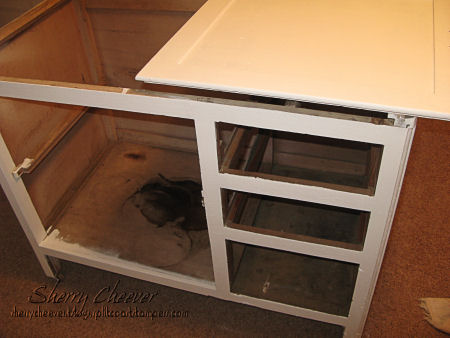
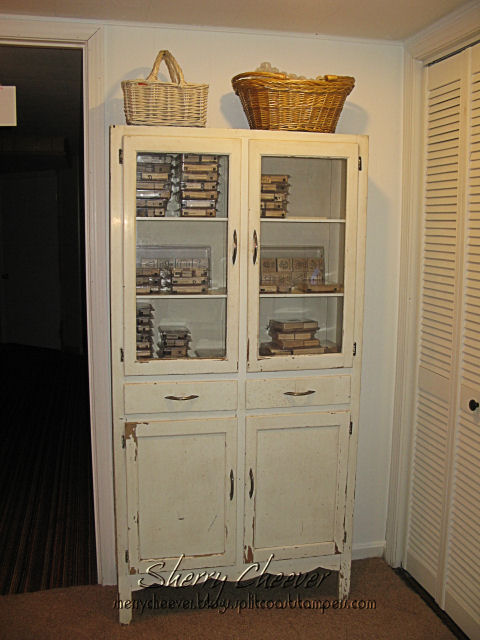
Here in this spot next to the closet will be my Stampin’ UP! Storage. It’s empty at the moment because I haven’t gotten the cabinet yet. I went to the river on Monday night to look it over, empty it out and beg Kate and Will to bring it to me in his truck. It’s a great old white china cabinet built by Scheirich Cabinet Company here in Louisville, KY. Envision along with me – a white cabinet, with glass front doors at the top with three shelves. In the middle are two side-by-side drawers, and then on the bottom there are three more shelves hidden by door fronts. I know I will be heaven with this piece. It will need painting, but that can wait until after CHA.

Cabinet Wall

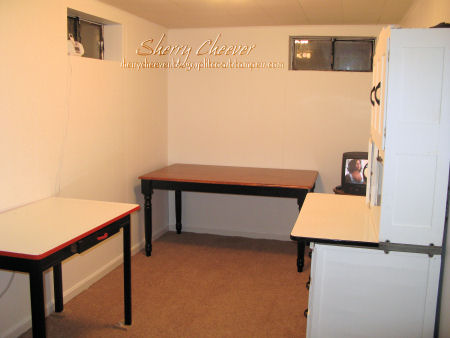
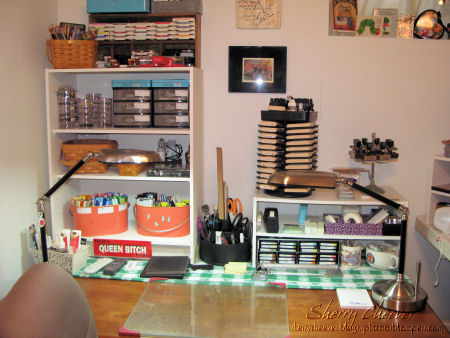
As we look to the right, this is my work station (the top part of the “L”).

Work Area

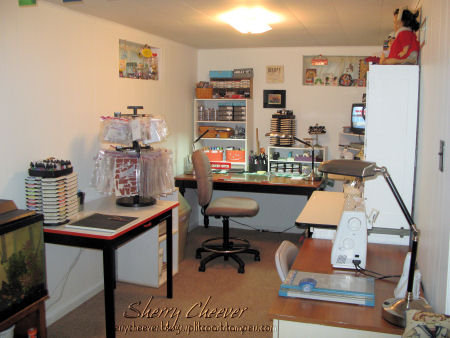
The old water table holds my Clip-it-Up with all my unmounted rubber and my large Score-It. To the side are white stackable shelves that hold all my 12×12 packs of Designer Paper.

Water Table

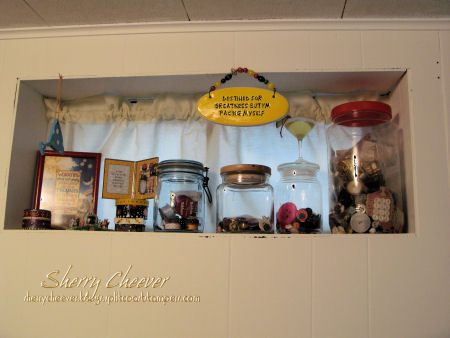
The window sill above this area holds a few items that I like to have around for inspiration and my button collection.

Button Window

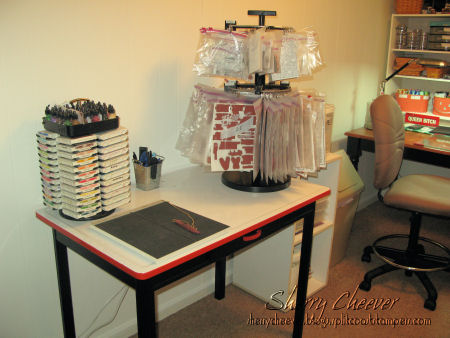
Here we have a close-up view of my work table. I took a small white cabinet that Kate left behind, took the doors off and used it for shelving space. The table cloth is an old one that my grandmother used, and there is a glass cutting board in the middle that I’ve used for some time now to sponge, cut and stamp on.

Work Table

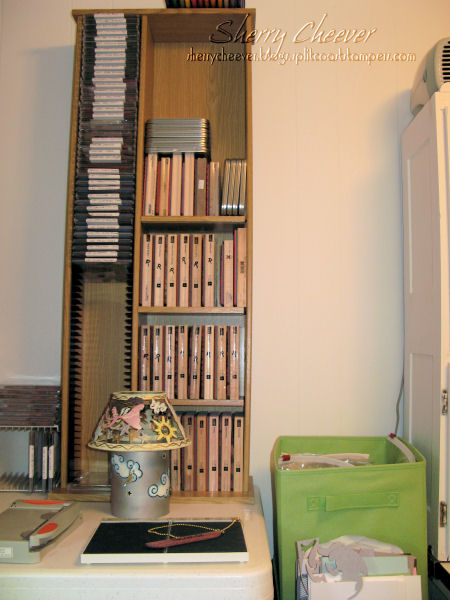
As we swing around to the right, you will see my SU backgrounds and all the other stamps that I receive in CD cases. My 6×6 pads of Designer Paper are held in the cloth cube that sits on top of some of my ribbon.

Stamp Tower

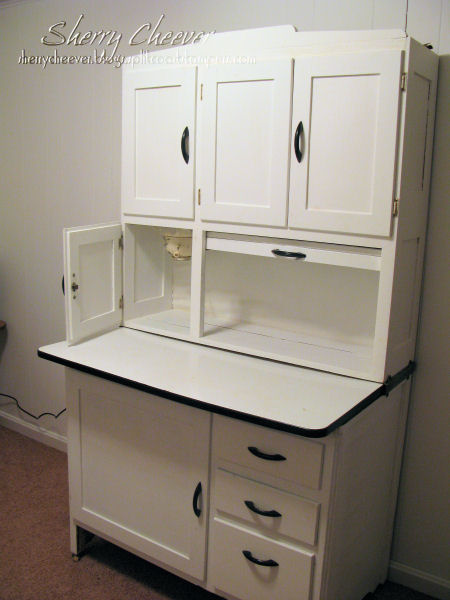
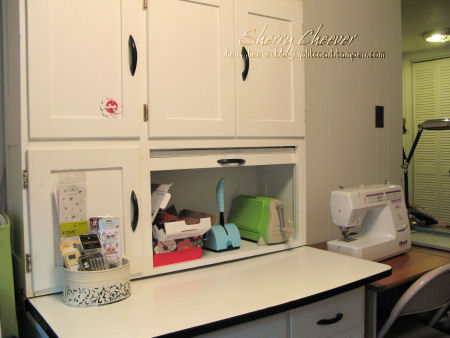
The Hoosier cabinet holds my Cuttlebug, Dies, Bind-it-All and all other wood mounted stamps. The best part about this cabinet is that the enamel top pulls out and makes a wider work space if needed. Can I tell you how proud I am of this cabinet!

Hoosier Cabinet

Sitting on top – Chatty Cathy, Madam Alexander Marmee and one of the daughters (Meg, Amy or Beth – I can’t remember) of Little Women, and my very first doll ever – a German Paper Mache Doll that now has no eyes. They are there, but they rattle around a bit. When I was born, my birth father was stationed in Germany and sent the doll home to me.

Dolls

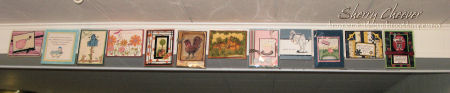
Before we move back to the bottom part of the “L,” and if you look above, I have hung some of favorite cards that I’ve received from some wonderful and fabulous friends.

Cards

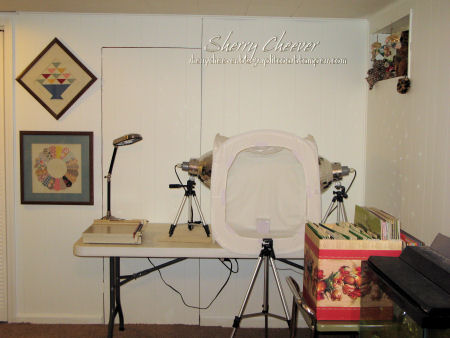
Now as we look back to the bottom of the “L,” you will see my Stamp Club Table. Since my club only meets every other month, I have set it up as my photography station. The light tent and lights can easily be moved when Stamp Club is due in (or if I happen to have visitors who need a place to stamp).

Photo Table

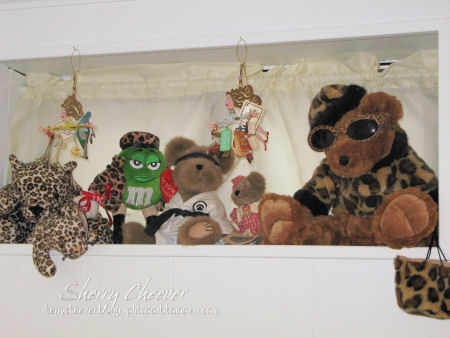
In the window above this table, I have my collection of leopard print stuffed animals and a few other meaningful things.

Bear Window

As you leave the area, you will see hanging on the wall two quilt pieces that have been framed. These were made by either my great-grandmother of great aunts. I’m not sure actually. They were in with some squares that my grandfather gave me many years ago and I had them framed.

Quilt

I feel so blessed to have this room and have surrounded myself with cherished belongings and items that I have drawn inspiration from.

Thank you for visiting today and I hope you enjoyed your tour.

Good Monday morning! I hope everyone had a great weekend. I spent Saturday and Sunday moving into the new rubber room. I’ve decided to wait to show you pictures until I’m finished moving in. I’ve got just a few things to finish up today, and then I’m done! Well, probably not done, because I haven’t worked in there yet and you know how that is. I’ll probably sit down to stamp and realize that I’ve got something in the wrong place and will need to move it. As I carried stuff down, I’ve tried to put it in the place where I think it needs to be. I already made on move yesterday and now find myself without a desperately needed cabinet. Luckily my mother was here at the time, and she had a great idea. After she left, I almost couldn’t stop myself to run out and buy this cabinet on sale at Target. Lance had been out running errands and I did try to call him to pick it up for me, but of course, he never answered his cell phone. As we were talking about what I wanted, my mother called. She has a cabinet in the garage at the river house that was my grandfather’s. She is going to let me have it – WOO HOO! Now I just have to get Kate and Will to bring it down to me.

I need to go out today, run a few errands and pick up a few small things that I need to finish up. In the meantime, I do have another Lizzie Anne Cowboy card to share with you. Another in the Cowboy Series – can you stand it?

Cowboy w Kite

Once again, the cowboy is holding something in this hand. This time it is the kite from the High Hellos set. The images were colored with Copic Markers and then the edges of everything were sponged with Vintage Photo Distress Ink. The background paper and the image were sewn on the sewing machine just to add a little something to the card. The sentiment is from Just Words II.

Stamps: Cowboy, High Hellos and Just Words II from Lizzie Anne Designs

Paper: Neenah Classic Crest Solar White, SU Cool Carribean and Chocolate Chip, DCWV Retro Print Mat Stack

Ink: Adirondack Pitch Black and Espresso, Tim Holtz Vintage Photo Distress Ink

Accessories: Copic Markers, Sewing Machine, Large and Small Oval Punches, Photo Corner Punch, Brads, Ribbon, Mounting Tape

Don’t forget to check back tomorrow, I’m gonna be offering some Tawdry Treats that you are not going to want to miss!

Jan 252008

The end of Day 4 of the Rubber Room Remodel, and I’m right on schedule. Kate came by this afternoon and said they would be back tomorrow evening to get her desk and hopefully the aquarium. Everything else can stay for a while, since it isn’t in my way. Tomorrow I start moving in, much to the husband’s delight. I’m so tired of hearing him complain about moving a chair out of his way, or hitting the Clip-it-Up as he comes in the door. I’m sure he’s tired of complaining too!

Today I got the cabinet reassembled. It’s amazing how I found all the hardware that I removed some 20 years ago. As you can see from the photo, the original cabinet was white (check out the floor sifter on the left-hand side). It still has white paint on it that I decided to leave. I find great comfort in leaving some of the old cabinet still there. The handles are original. They were worn and rusted and I gave them a fresh coat of black paint today. The hinges are also original, with some white paint on them from a repainting many years ago. If I remember correctly, when I first started stripping the paint off, there were about four layers of white paint, and hidden beneath them all was some decorative painting on the upper doors. I vaguely remember a basket with flowers – much like an old quilt pattern. The enamel top to the cabinet pulls out and makes a larger work space.

Day 4 Cabinet

The table to the left in the photo below is what my grandfather called a water table. He actually made this table. When he gave it to me, the table was white with the enamel top trimmed in red. At some point I was using the table as a computer desk and painted it brown. As proud of myself that I was, he let me know in no uncertain terms that he had never seen a water table that was brown. They were always white. I wonder what he would say now that it has a fresh coat of black paint.

Day 4 Partial Room

When Lance and I got married, he brought along a bookcase built by his grandfather. We used it in our first apartment to hold can goods in the pantry and then after the girls came along, it has held all their books. Today I unloaded all their books and painted the bookcase black. I now have to find something to store their books in and not on Mallory’s bed where they are right now. I can’t get rid of them. I might have grandchildren some day!

Day 4 Bookcase

As I have worked these last few days painting and working of old family pieces, it has brought back so many memories. I can see my great-grandmother’s Hoosier Cabinet sitting in her kitchen, the wood stove in front to the left, and feel the warmth of the kitchen on a cold winter morning. On the back porch was an old water table along with another old wood table. I can still smell the apples from the orchard. I am so glad that I decided to use these pieces in the new rubber room. The feeling of accomplishment I have does not compare to the sense of family and heritage that I once held so dear and had forgotten. I think I have found the balance that I have been missing!

Jan 242008

Oh my Badness! It’s the end of Day 3 of the Rubber Room Remodel and I am literally crawling on all 4’s. There isn’t a muscle in my body that doesn’t ache and I ruined a pair of my favorite flannel pants. I don’t know when it happened today, but I completely ripped the seat of my pants out. I remember getting caught on something, but thought that was just it – I got caught. Sometime early evening, I was feeling a little cold. There was this slight breeze on my legs. Well duh, the pants were ripped all the way down to my knee! I so hope that I didn’t rip them in the shed today and all the neighbors got a great view of my butt. No one screamed so I guess I didn’t scare them!!!

Back in the mid-1980’s my grandfather gave me a Hoosier Cabinet. Lance and I had just moved to Lexington, Kentucky and I needed something for storage. I always thought my grandfather had built the cabinet, but he actually bought it for someone in his family. My grandfather worked at the old Scheirich Cabinet Company in Louisville, retiring in 1972. I used it for a desk for a few months, and then I got the bright idea to strip the cabinet and refinish it. I took the cabinet out to my dad’s business (where Lance worked), and started trying to refinish it. Little did I realize that the cabinet was pine and really wouldn’t make a pretty finished piece. Shortly after starting on the cabinet, I became pregnant with Kate, and never went back to the business to finish up. Little did I know, Lance had moved the cabinet outside and it was sitting in the weather. We moved to home to Jeffersonville and I made him get the cabinet and bring it along. While we rented in an apartment, it sat in storage and then when we purchased our house, it was put in the shed in the backyard. The drawers and cabinet fronts have been stored in the basement for close to 21 years. I’ve pulled the cabinet out of the shed a few times and sanded on it, but the task was so daunting, that I just couldn’t face it.

Well, today I finished the cabinet. Well, at least it is painted and ready to assemble tomorrow. I had made up my mind that I NEEDED this cabinet in the new Rubber Room. I started carrying the cabinet into the house this morning. Luckily it had never been put back together properly, and I could carry it in 3 separate pieces. It definitely shows water damage, but for my purpose it will work. I feel so horrible that it has taken me all these years to finish this cabinet, and that something that my grandfather gave me is in such bad shape. However, the cabinet is painted and hopefully he would be happy with that! I’m quite sure though, that he would not be happy with the shape the cabinet is in.

Anyhoo, this is what I have accomplished today. Not much to look at right now, but I am rather pleased with myself!

Cabinet Top

The spot in the cabinet that is not painted, was left the way it originally was. A flour bin hangs in this spot, and the bin pulls out from the top.  Another bad thing is that the fabric on the back of the roll top has dry rotted, so it doesn’t want to work.  But that’s okay!

Cabinet Base

© 2015 Suffusion theme by Sayontan Sinha