Smiley from millan.net  Happy Thursday!  A few months ago, Beate from Splitcoaststampers asked me to write a tutorial on that “inky thing I do.”  It was published yesterday on Splitcoaststampers and can be found under the Resources section as “Wrinkle-Free Distress.”  I contacted Tim Holtz and asked his permission to recreate the tutorial for SCS, and what he actually called this technique . . . I didn’t want to get it wrong!

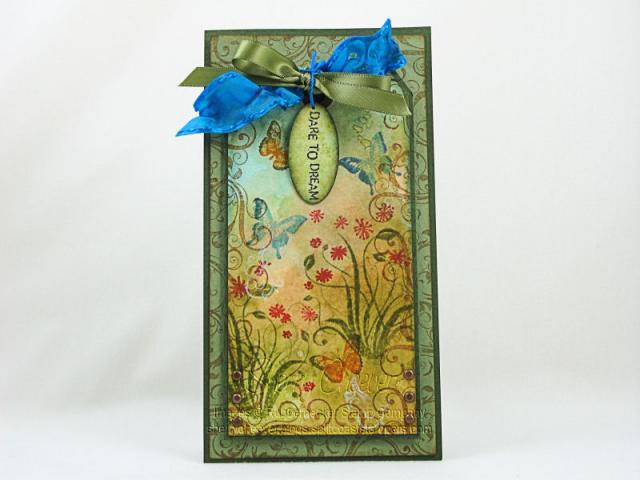
Here’s the card I created as my sample for the tutorial.

wringle-free-distress-finished-card.jpg

Instead of letting the tag stand alone, I decided to incorporate it into a card.  Once I had finished the tag, and had the layout for the card, I stamped the flourish images on both the card front and the tag.  I lined the flourishes up, and raised the tag with mounting tape.  Some of the images on the card, i.e., the butterflies and small flourishes are a sneak peek of what’s coming next from Rubbernecker Stamps.

  • Stamps: 427 Butterfly Inchies, 467 Floral Silhouette, 461 Scraps & Scuffs, 436 Flourish and 423 Flourish Inchies from Rubbernecker Stamps
    Paper: Manila Shipping Tag and Prism Herbal Garden Dark and Medium
    Ink:
    Ranger Archival Jet Black, Adirondack Snow Cap Pigment, and Broken China, Vintage Photo, Peeled Paint, Antique Linen, Spiced Marmalade, Black Soot and Faded Jeans Distress
    Accessories:
    Ranger Non-Stick Craft Sheet, Glossy Accents, Mini Mister, Cut-n-Dry Stamp Pad Felt; Venture Foam Tape; May Arts Ribbon; Copic At You Red Spica; DMC Embroidery Floss; Brads; Oval Punch; Candle Lighter
    All product and images from
    Rubbernecker Stamps

I hope you try this technique and have as much fun with it as I do!  Have a great day and thanks for stopping by!

Happy Thursday!  I’ve had a few ideas running around in my head (yes it hurts) for the last few days.  All of them revolve around notebooks.  I know, I know!  But all of a sudden I’m finding that when I need something to jot a note on, there is never anything close at hand.  I’ve recently organized the desk area in the family room, moving the desktop computer to the actual built-in desk and eliminating the computer hutch.  This has given us some much needed space to walk around the breakfast bar, but it has also caused confusion in other parts of the house.

I’ve set myself up in my little sitting room, with laptop on a TV tray and a table next to me.  However, that table has become a major catch all for all my junk. . . . Coffee cups, remotes, calendars, pencils, pens, papers and never can I find a piece of scratch paper to jot a simple note on.  I have solved that problem!

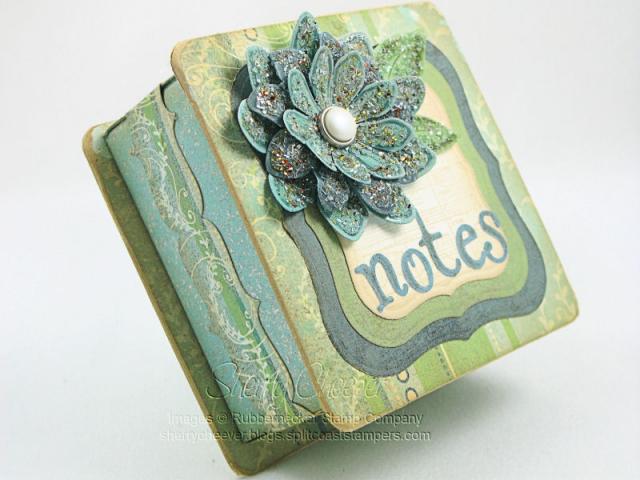
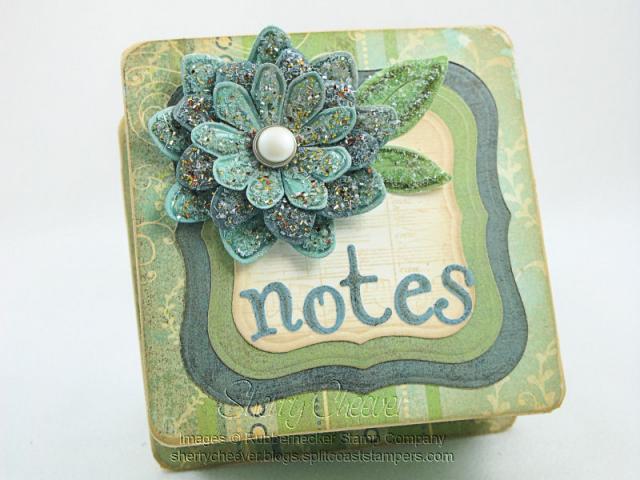
I made myself a little box to hold post-it notes!  I followed the instructions for the origami box in this week’s Try a New Technique Challenge on SCS, and then made a bottom and top out of coasters.

Notes Origami Box Side

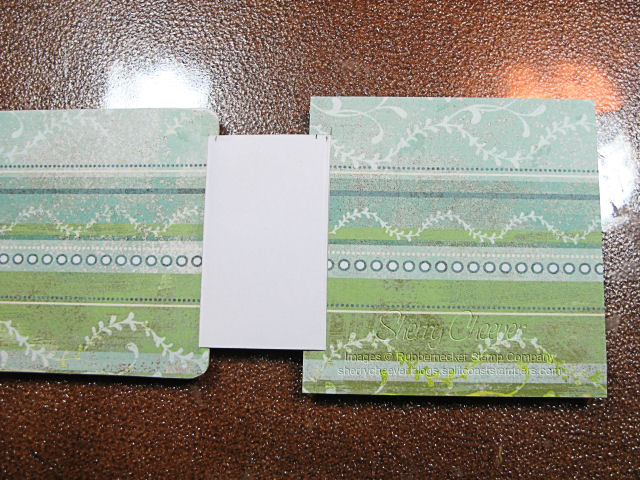
Instead of using a 12×12 sheet of paper as specified in the instructions, I used a 10×10 instead.  This gave me the right size so that the coasters I used for the top and bottom would hang over the edges of the box.  In order to cover the coasters and make a hinge for the lid, I decided to hide the hinge layer under the designer paper.  In order to do this, I needed to cut a slit in the paper used for the cover and then slip the hinge piece through so that I could glue it down.

inside unfinished

It was a little more work than what I had anticipated, but I’m very happy with the results.

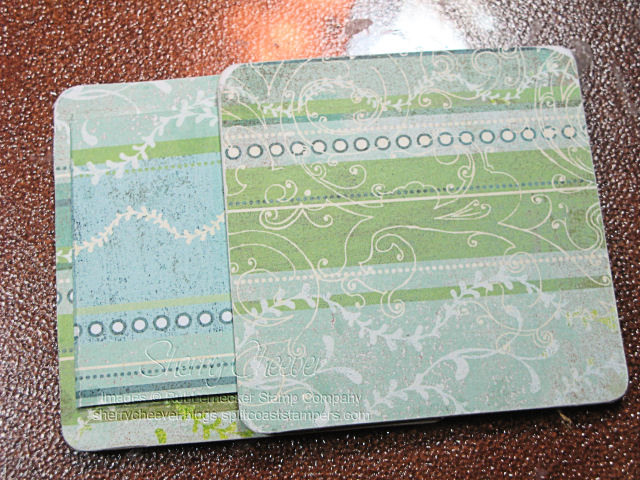
origami box lids

I would easily affix the bottom of the box to the bottom coaster, tape the hinge to the back of the box and then have my lid just flip open.

Origami Box Front

To decorate the top of the box, I finally settled on the Spellbinders Daisy Delight Shapeabilities.  I die cut and embossed the shapes, sponging the embossed areas and then covered the whole darn thing with Ranger Glossy Accents and different types of glitter.  To have something to put the daisy and my little word notes (made from Spellbinders Mystic Alphabet), I decided to cut layers using the Spellbinders Labels One Nestabilities.

One project down and one to go!  I’ve been thinking about this last one since I made the notebooks for family at Christmas.

I hope you enjoy the adventures that this day brings  . . . I know I will!

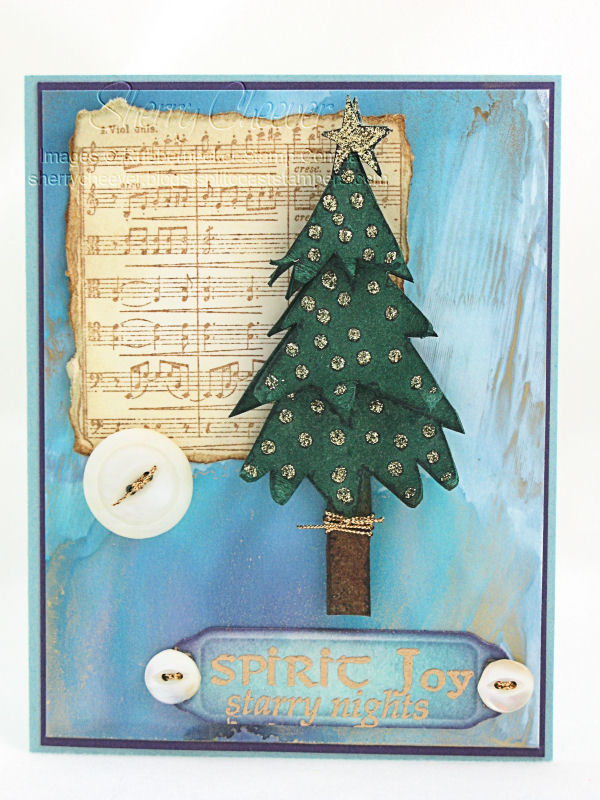
Good morning!  How many of you have been checking out Tim Holtz’ 12 Tags of Christmas?  He never ceases to amaze and inspire me! I used yesterday’s alcohol ink technique on my card today.  I guess you could say this is my take of Tag #2, with a little bit of inspiration from Wendy Vecchi thrown in.

This card is also for today’s Rubbernecker Blogger Challenge, Nix the Ribbon.  This week’s challenge is hosted by Bev Gerard, and you can find all the info and deets on the Rubbernecker Blog.

RBC12

I made the background using Eggplant, Stream and Gold Metallic Alcohol Inks.  I smeared them on my Ranger Craft Sheet, added some Alcohol Blending Solution and then swirled and swiped white glossy cardstock through the mixture.  I loved the results so much, and it actually reminded me of snow, ice and northern lights.  Here’s where I decided to add a Grunge Board tree, inspired by the Grunge Board flowers made by Wendy Vecchi.  I stamped the tree image three separate times on a piece of plain Grunge Board.  I cut them out, each time leaving off one layer of the tree.  Each individual piece was inked with Pine Needles Distress Ink and then Gold Stickles were added to the exposed areas for each layer.  It’s hard to see in this picture, but the ends of each layer are curled up to add some fun dimension.

Instead of using Grunge Board for my sentiment, I die cut a piece of light weight chipboard with the Spellbinders Ribbon Tag Trios, applied my ink and then embossed the sentiment.  Since we were to use no ribbon in today’s challenge, I went digging through my button collection for some old buttons, and tied them on using gold cord.

  • Stamps: Rubbernecker Winter Holiday – Tree With Snow set SKU:52-0206; Stamp Oasis Graphics – Music Background SKU:543 SO and Winter Holiday – Season’s Sentiments SKU:153 SO from Rubbernecker Stamp Company
  • Paper: White Glossy; SU Elegant Eggplant and Baja Breeze
  • Ink: Ranger Archival Jet Black; Embossing, Pine Needles, Dusty Concord, Broken China, Old Paper and Vintage Photo Distress; Stream, Eggplant and Gold Metallic Alcohol Inks
  • Accessories: Spellbinders Ribbon Tags Trio Shapeabilities; Ranger Non-Stick Craft Sheet, Gold Stickles, Queen’s Gold EP, Alcohol Ink Blending Solution, Inkssentials Ink Blending Tool; Tim Holtz idea-ology Plain Grunge Board; Venture Foam Tape; Gold Cord, Old Buttons; Light Weight Chipboard

Have a great day and remember

Take the path less traveled – there’s always an adventure waiting for you!

Smiley from millan.net Happy Monday!  I’ve got to tell ya, it’s already been a very busy morning around my house.  Even though it’s quiet, it has been busy!  I can hardly believe that I’ve already had a shower, dressed for the day and have been in the studio already.  Yes, I might have a fever!!!!

After I caught up on emails and my blurfing this morning, I checked out the Technique Lovers Challenge on Splitcoaststampers.  It’s such a great challenge today!  If you find yourself giving gift cards during the holidays, this is one you need to check out.  The challenge is to make a pop-up gift card holder!  Oh my BADness, they go together so quickly and would also be great if you are giving a bit of cash instead of a gift card.  I myself am a little leery about gift cards this holiday season . . . you never know if the company is going to be in business long enough for the gift card to be redeemed.

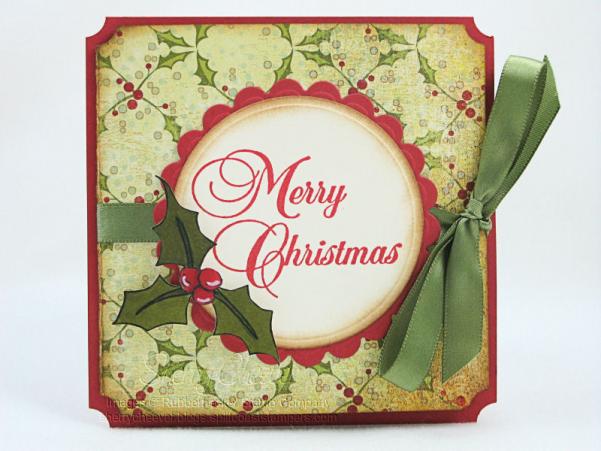
I decided to show you both the front,

TLC196 front

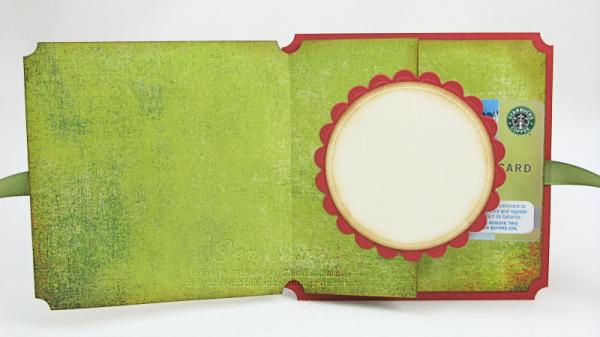
and the inside.  I made the same design for the inside that I used for the image on the front, so that I could write a personal note.

TLC196 inside

The holly was colored with Copic Markers and then cut out, so that I could mount them on the sentiment panel.  Spellbinders Circle Nestabilities were used to make both the image panel and the one on the inside.

  • Stamps: KK Originals Christmas:  Holly SKU:21-07 KK and Rubbernecker Winter Holiday:  Christmas Script SKU:255-04 from Rubbernecker Stamp Company
  • Paper: BasicGrey Fruitcake; SU Very Vanilla and Riding Hood Red
  • Ink: Tsukineko Memento Tuxedo Black; Ranger Vintage Photo Distress; and SU Riding Hood Red
  • Accessories: Copic Markers; Spellbinders Classic Circle Nestabilities; Tsukineko Sponge Dauber; Venture Foam Tape; Ribbon; Ticket Corner Punch; Ranger Inkssentials White Opaque Pen

Have a great day everyone!  I might break down and give these stinky dogs a bath – remember I said “might.”

Happy Thursday!  Smiley from millan.net I have Stamp Club here Saturday afternoon, and I’m trying to come up with ideas.  Because my mother is attending this month, and bringing a friend, I feel the pressure to make club special.  Now my mother is NOT a stamper!  I’ve tried to get her interested over the years and feel it is something she would enjoy.  She’s quite artistic and has an excellent eye.  Her friend she is bringing, IS a stamper.  She normally attends a stamp club somewhere else.  After seeing some of my cards that I’ve given mom, she has decided she wants to learn some of the things that I do.  No pressure there . . . . Smiley from millan.net

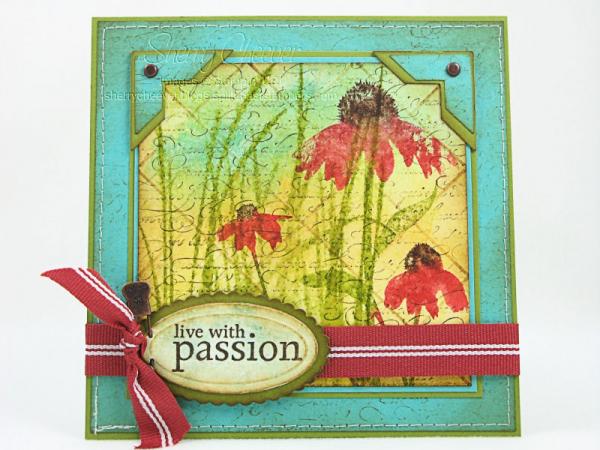
I have had one idea in mind, and then when I saw the Ways to Use It Challenge on Splitcoast this morning, I knew exactly what one of my projects would be.  The challenge today is to use watercolor paper.  Now if you know me, and have followed my stamping for a while, you know that one of my favorite techniques is stamping on wet watercolor paper.  I may have bit off a bit more than I (or they) can chew, but hey . . . they are experienced stampers (well, except Mom).

Anyhoo, here’s the card that I will use as a sample for their project.  I will give them some leeway, like the sewing and maybe the initial background.  Those items will be their option.

WT192

Starting with my watercolor paper, craft sheet and Distress Inks, I created a background for the stamping.  I swiped a line of Broken China, Spiced Marmalade and Mustard Seed down my craft sheet, misted the ink with water, and then laid my paper into the ink mixture.  To dry the first layer of color I used my craft iron and ironed over the watercolor paper.  I continued this process until I had the desired color I wanted for the background.  Because I would be using more water, SU En Francais was stamped in Ranger Archival Coffee.  The stamps from Inspired by Nature were then inked, misted with water and stamped on of everything else.  I misted the grass a tiny bit to make it appear more in the background before I stamped the flowers.  For the finishing touch to this layer, I scored 1″ lines on the back of the panel and then highlighted the score lines and the edges with Vintage Photo Distress Ink.

The sentiment was stamped on watercolor paper that I had inked with Broken China Distress Ink.  The sentiment was then die cut using Petite Oval Nestabilities (the detail of the embossing on the watercolor paper is amazing).  A Tim Holtz Trinket Pin was slipped through the sentiment to hold my bow.

  • Stamps: En Francais and Inspired by Nature from Stampin’ UP!
  • Paper: Canson Watercolor; Prism Vibrant Teal; SU Old Olive
  • Ink: Ranger Archival Coffee, and Spiced Marmalade, Broken China, Mustard Seed, Vintage Photo Distress; SU Riding Hood Red, Old Olive and Chocolate Chip
  • Accessories: Sewing Machine; Spellbinders Petite Oval Nestabilities; Scor-Pal; Ranger Mini Mister, Craft Sheet, Inkssentials Blending Tool, Glossy Accents; Tim Holtz idea-ology Long Fasteners and Trinket Pin; SU Corner Punch, Stampin’ Write Markers and Riding Hood Red Ribbon; Clover Craft Iron; Venture Foam Tape

I suppose that’s all I have today.  Actually, the mailman just came and delivered this huge box of alterables that I ordered from eclectic Paperie . . . Oh My BADness . . . stamp club projects are going to have to wait just a bit longer!  Goodies galore!!!!! Smiley from millan.net

Smiley from millan.net

© 2015 Suffusion theme by Sayontan Sinha